SNMP Configuration – Step by Step
SNMP is the standard protocol for monitoring and managing networks. The acronym SNMP is an acronym for “Simple Network Management Protocol”.
In practice, SNMP is the most used protocol to know what happens inside network assets and services.

Plugin SNMP (Download)
- SNMP is the standard protocol for monitoring and managing networks. The acronym SNMP is an acronym for “Simple Network Management Protocol”.
- In practice, SNMP is the most used protocol to know what happens inside network assets and services.
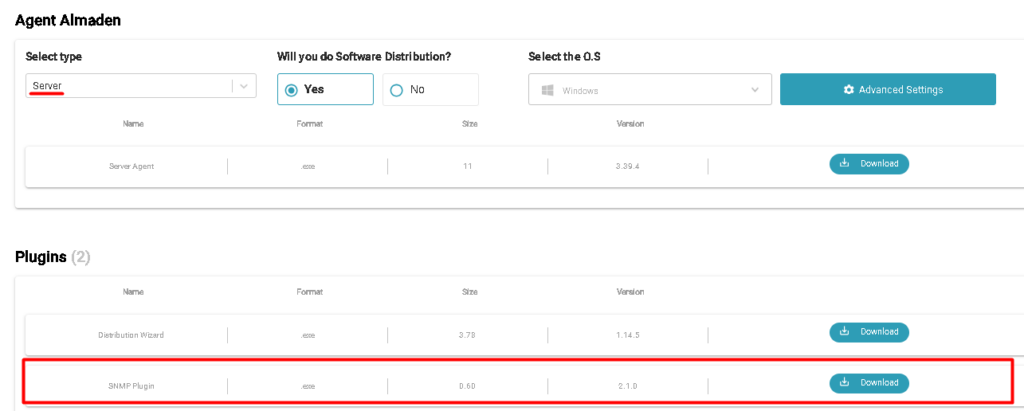
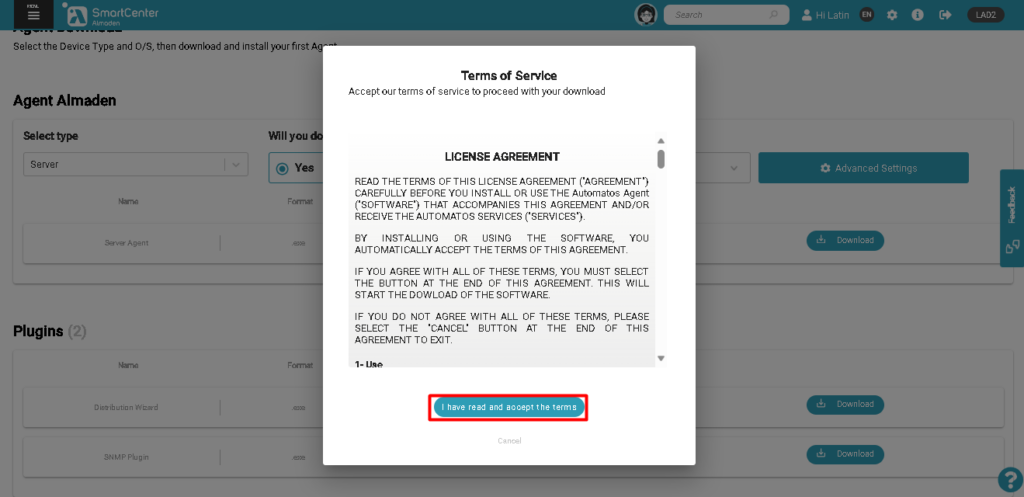
- Read and accept the terms to start downloading the plugin.
Installing SNMP Plugin
- After downloading the Plugin, double-click on the executable to start the installation:

Note: The plugin can only be installed on a server with ASA.
- Click Next to continue.

- Read and accept the license terms and click: Next.

- Click Install to start installing the plugin.

- Installation complete, click: Finish.

Configuring SNMP Plugin
- Execute o ASA Control. (C:\Program Files (x86)\Automatos\Automatos Server Agent)

- Click: Configuration > Agent.

- Click on the tab: Plug-ins, where you will be able to view the SNMP config plugin.

- Double-click on the plugin: SNMP config to start configuration.

- There are two possibilities for associating devices with SNMP protocols.
- Adding the device IPs in the option: Add;
- Performing Scan using the option: Discovery.

Associating devices with the plugin
- Option: Add
- Click on the button: Add;
- In target > IP address, enter the desired IP, then click on the button: Test.

- After testing with status: Success, click OK to add.

- Added example device.

- Opção: Discovery:
- Click on the button: Discovery;

- Enter the IP Range you want to scan.
- Click the button: Start to start the scan.

- Selecione o IP desejado e clique no botão: OK.

- Added example device.

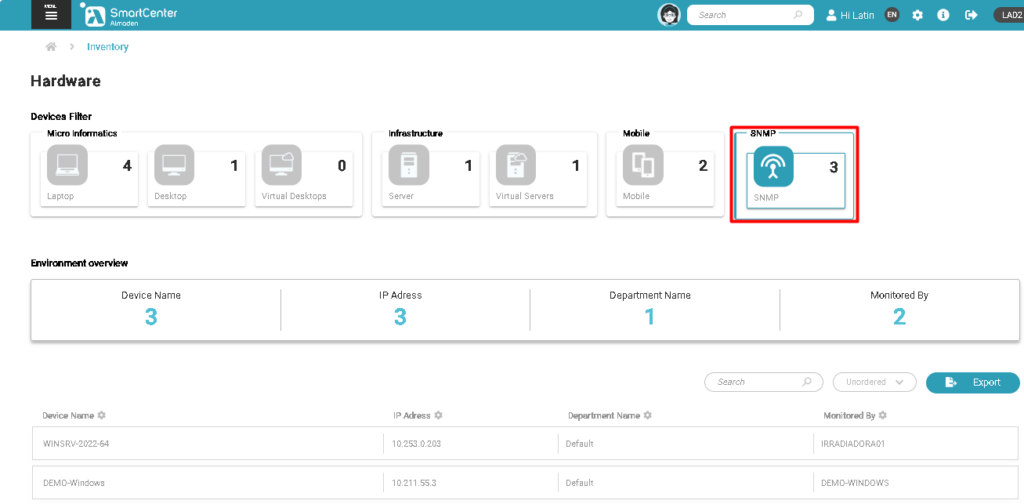
View assets associated with the SNMP plugin on the SmartCenter Portal.
Menu > Hardware to view the added asset.

Permission to display the SNMP Menu.
By default, the SMNP menu is disabled, to enable the Menu view, follow the steps below:
- To allow subaccounts access to the SNMP menu in the SmartCenter portal, permission must be granted.
- Access: Menu >Settings >Administrative >Subaccounts >Permissions.
- Create a group and enable the permissions: SNMP and any other permission that subaccounts in this group can view.
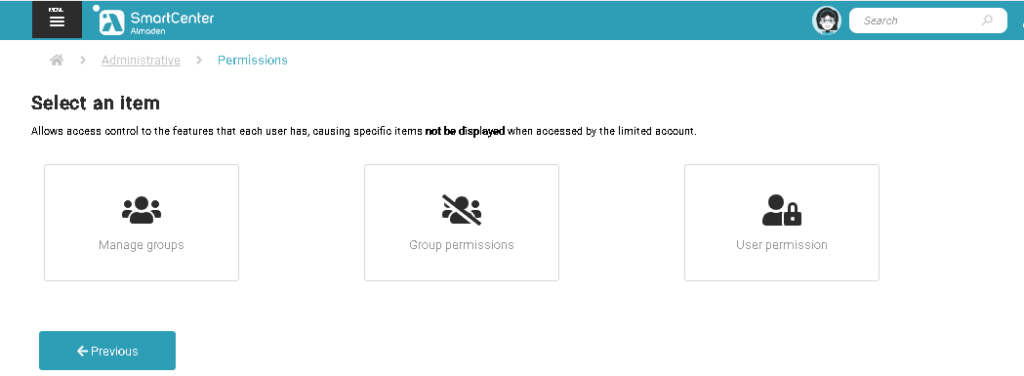
- Permission disabled by default, to enable click the button as shown below.
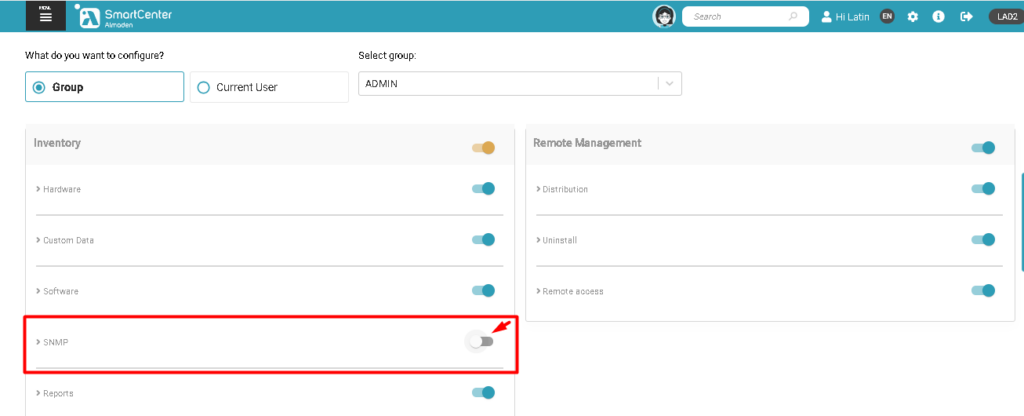
- Permission granted.
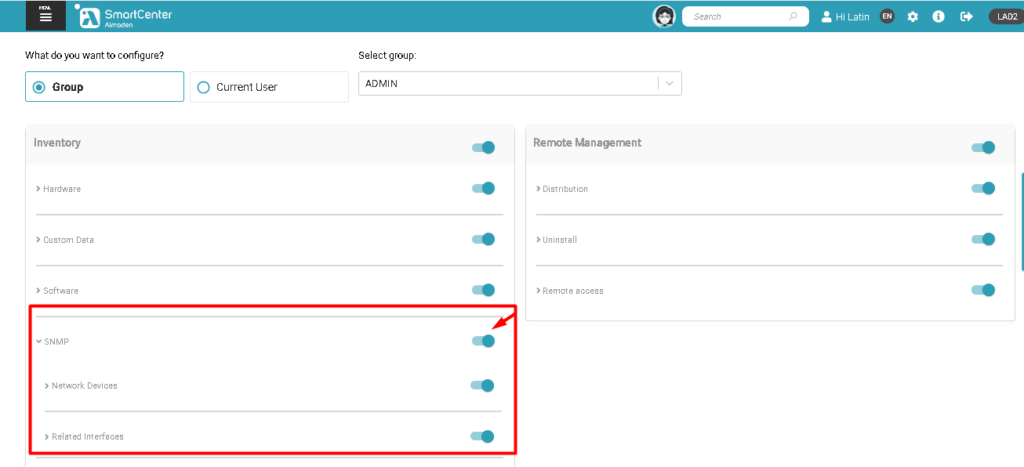
- Button access: SNMP being displayed after release.

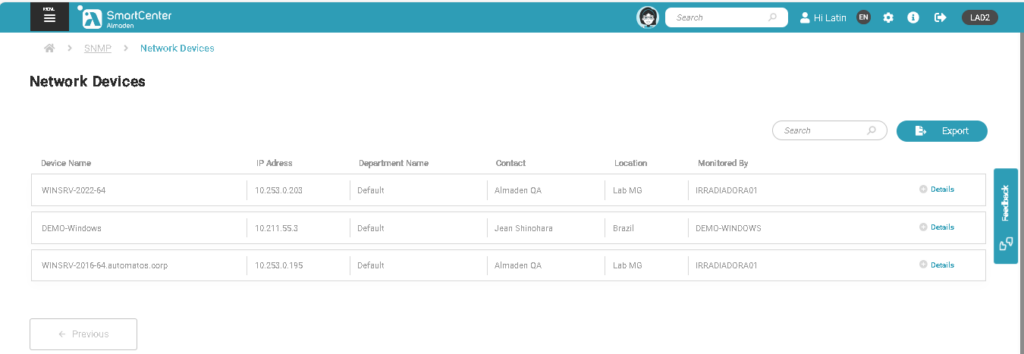
- Menu to access information about monitored devices.
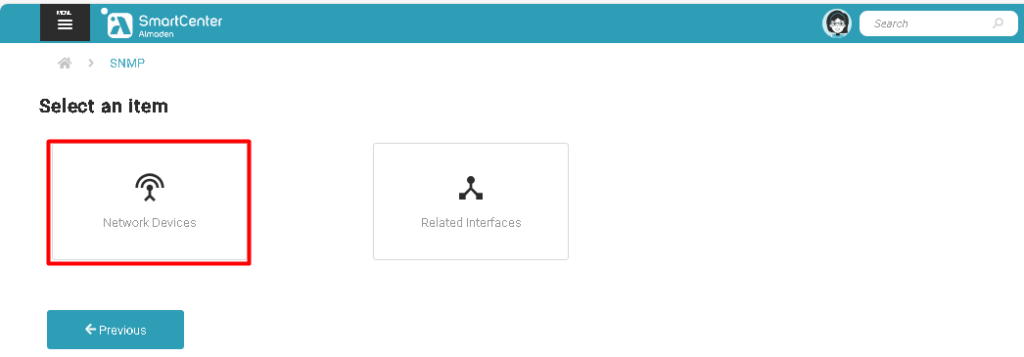
- Information from monitored devices.
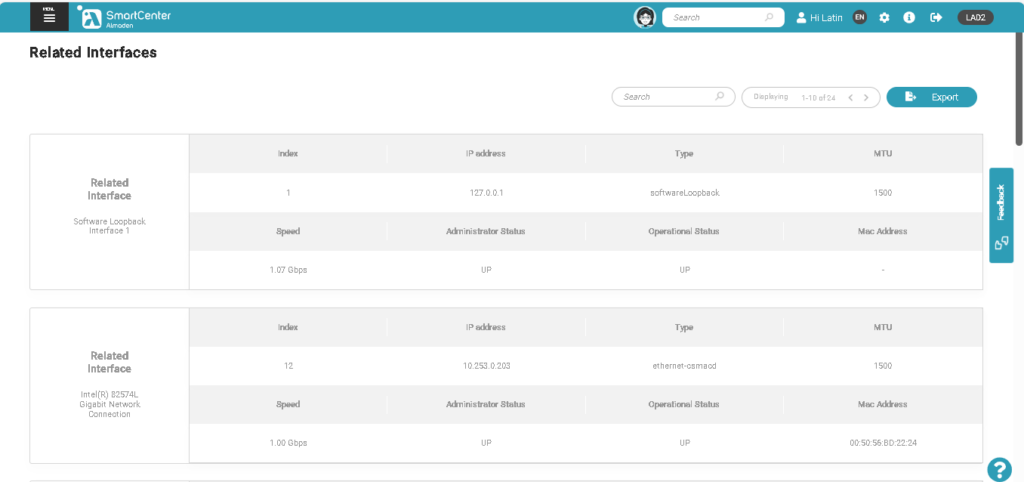
- Interface menu for devices associated with the SNMP plugin.

- Interface information for all assets associated with the SNMP plugin.
