Custom Data
Import Data
Import data into the custom form
This feature allows for fast and efficient importing of large volumes of information into your custom forms using CSV files. With it, you can automatically fill fields such as option, text, date, and number for multiple records, avoiding manual work and speeding up data updates.
This functionality is ideal for:
- Periodic bulk updates of custom data
- Migration of information from other systems
- Correction and enrichment of existing records
To import data in bulk with form responses, follow these steps:
Step 1 – Export data
Access: Menu > Inventory > Custom Data > Form > Export
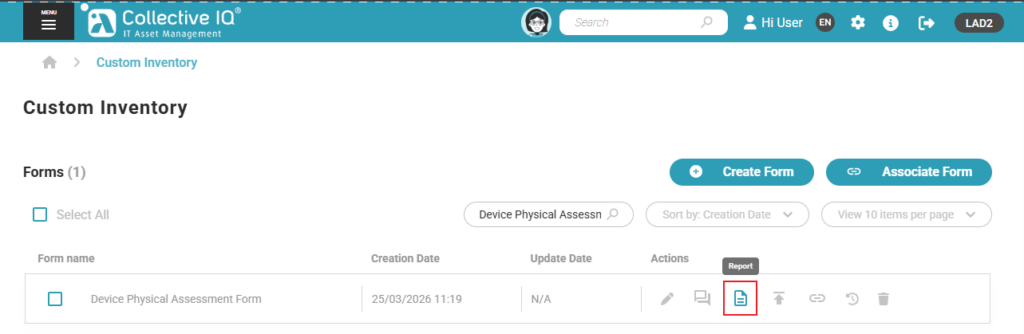
- Export button
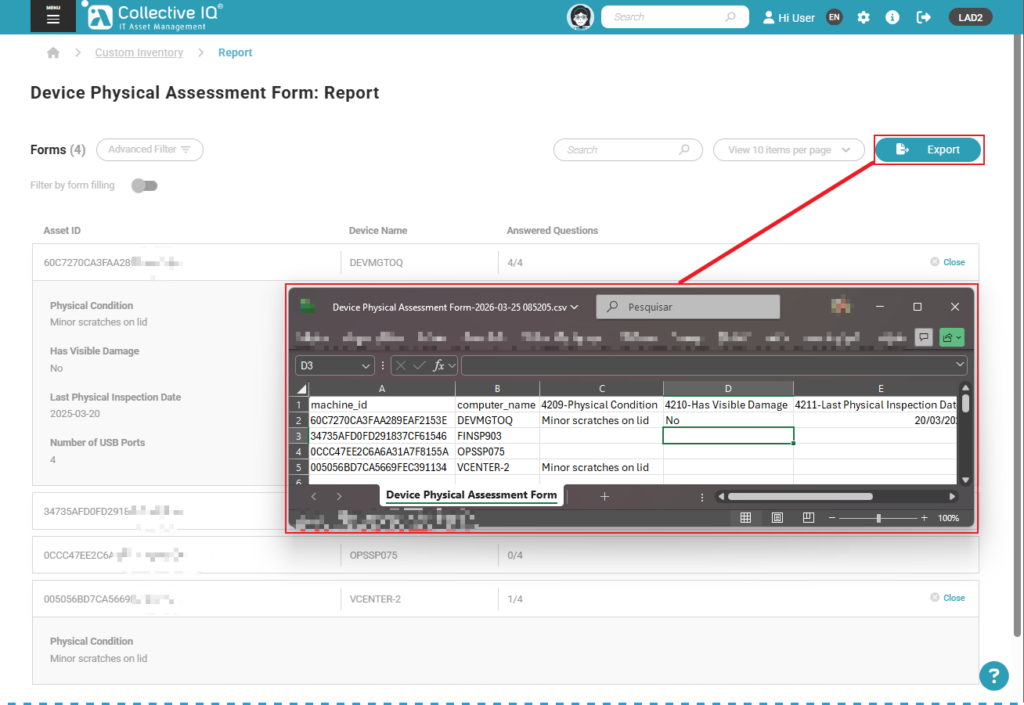
Step 2 – Edit the CSV file and import the data.
- Edit the exported report file.
- Modify or add data as needed, but do not change the column names.
- Save the file in .CSV format.
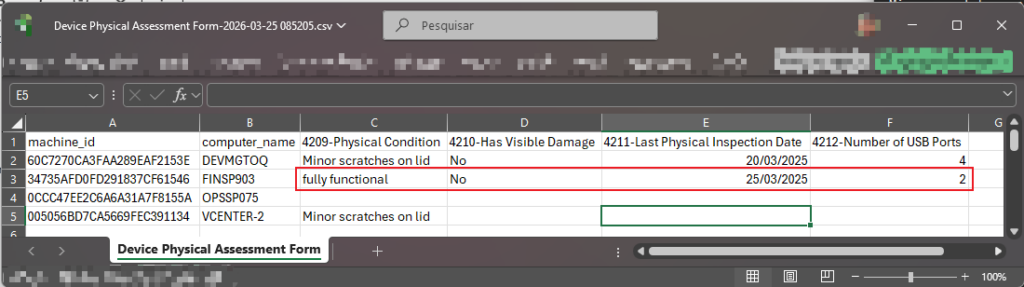
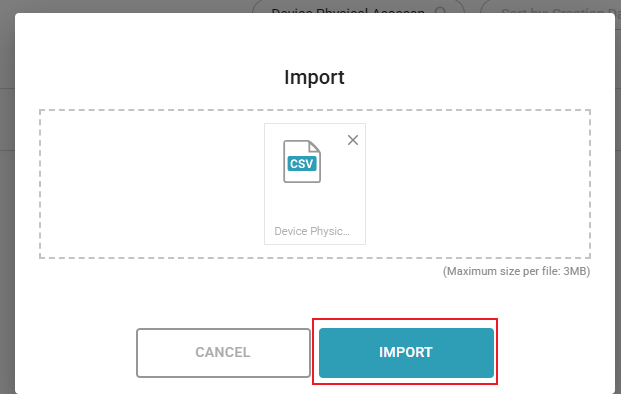
- Import the data.
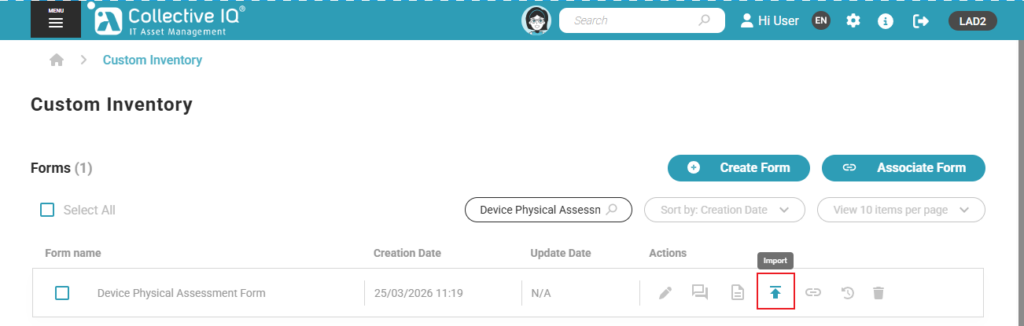
- Select file
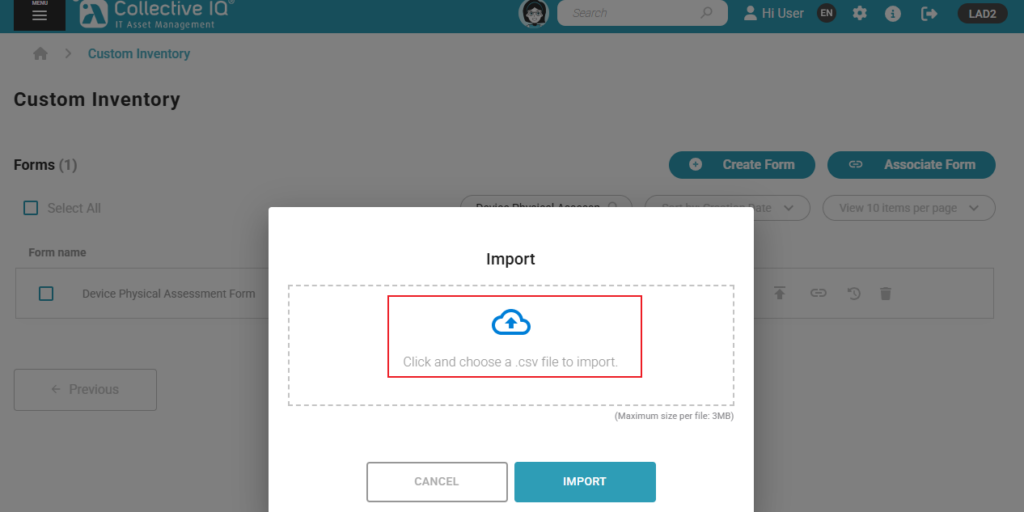

- Import
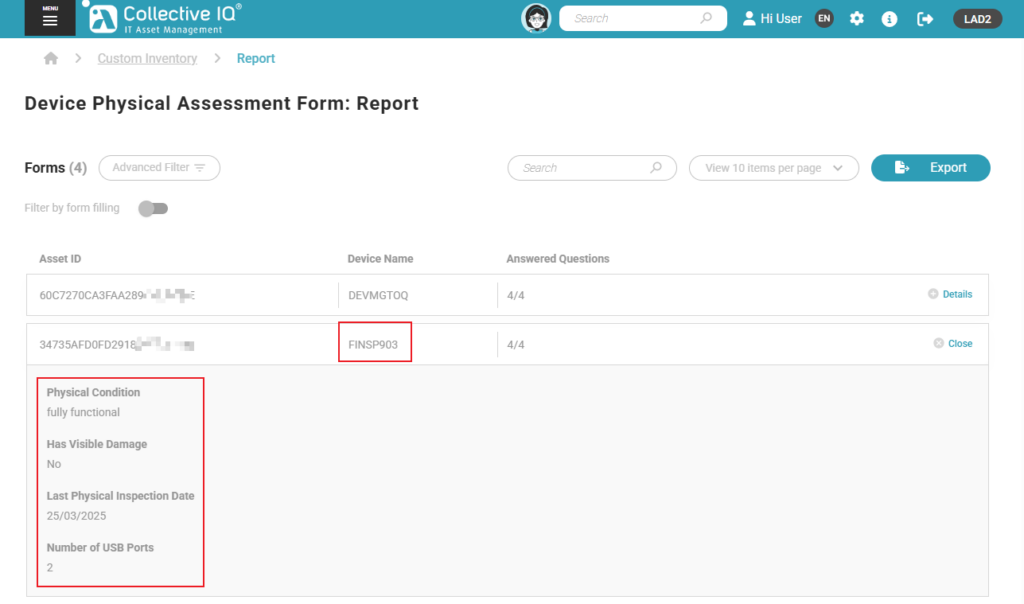
Step 3 – Viewing the data
Access: Menu > Inventory > Custom Data > Form > Report
- Access the report again and you will see that the data has been imported.