
Installation – Almaden TCP Relay
Installing Almaden TCP Relay on Microsoft Windows
The Almaden TCP Relay enables endpoint communication with the Almaden Receiver by forwarding traffic between Almaden Agents and the Receiver. This guide describes how to install the Relay on Microsoft Windows.
Before You Begin
Before starting the installation, ensure that you have:
- Downloaded the
Almaden TCP Relayinstaller – Guide Here. - Local administrator privileges on the target machine.
- Receiver hostname or IP address.
- Receiver communication port.
LAD1: lad1-receiver.almaden.app:443
LAD2: lad2-receiver.almaden.app:443
Running the Installer
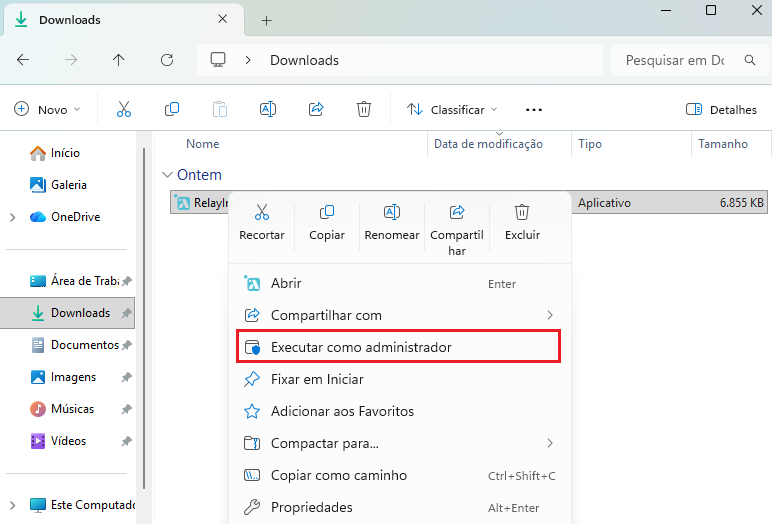
Run the downloaded Almaden TCP Relay installer using an account with Administrator privileges.
The installer automatically configures the Relay using the settings defined when the installation package was generated.
The installation process is completed automatically and typically takes less than one minute.
Installation Complete
When the installation completes successfully, the following Windows services are installed automatically:
- Almaden Relay UI
- Almaden TCP Relay
Both services are configured to start automatically when Windows starts.
Verifying the Installed Services
After the installation is complete, verify that the Relay services were installed successfully.
- Press Win + R.
- Type services.msc and press Enter.
- Verify that the following services are present:
- Almaden Relay UI
- Almaden TCP Relay
Both services should have:
- Status: Running
- Startup Type: Automatic

To verify the installation location, open the properties of each service and confirm that the executable path points to the Relay installation directory.
Almaden TCP Relay
"C:\Program Files\Almaden\TCP Relay\relay\almaden-tcp-relay.exe"

Almaden Relay UI
"C:\Program Files\Almaden\TCP Relay\ui\relay-ui.exe"
Note: If either service is missing or not running, verify that the installation completed successfully and restart the service before accessing the Relay Dashboard.
Relay Configuration in Windows Registry
After the installation is complete, the Almaden TCP Relay stores its configuration in the Windows Registry. Administrators can use the Registry Editor to review or modify the Relay configuration without reinstalling the application.
To open the Registry Editor:
- Press Win + R.
- Type regedit and press Enter.
- Navigate to the following registry path:
Computer\HKEY_LOCAL_MACHINE\SOFTWARE\Almaden\TCP-RELAYThe registry contains the main Relay configuration parameters, including communication settings, Receiver information, Relay ports, and firewall configuration.

Registry Configuration Parameters
| Registry Value | Description |
|---|---|
| windows_linux_receiver_address | Hostname or IP address of the Almaden Receiver. |
| windows_linux_receiver_port | Communication port used by the Almaden Receiver. |
| tcp_relay_port | TCP port used by the Relay to receive incoming connections from Almaden Agents. |
| relay_ui_port | TCP port used by the Relay Web Interface. |
| firewall_type | Specifies the configured firewall mode (Explicit or Transparent). |
| firewall_address | Hostname or IP address of the firewall or proxy server. |
| firewall_port | TCP port used by the firewall or proxy server. |
| firewall_username | Username used to authenticate with the firewall or proxy server. |
| firewall_password | Password used for firewall or proxy authentication. |
| firewall_domain | Windows domain used for NTLM authentication, when applicable. |
Applying Configuration Changes
Any changes made directly in the Windows Registry affect the Relay configuration. After modifying one or more registry values, restart the following Windows services to apply the new configuration:
- Almaden TCP Relay
- Almaden Relay UI (only if the relay_ui_port value was modified)
Important
- Modify the registry only if you are familiar with the Relay configuration.
- Incorrect registry values may prevent the Relay from communicating with the Almaden Receiver or accepting connections from Almaden Agents.
- Before making changes, consider exporting the registry key as a backup so the original configuration can be restored if necessary.
Accessing the Relay Dashboard
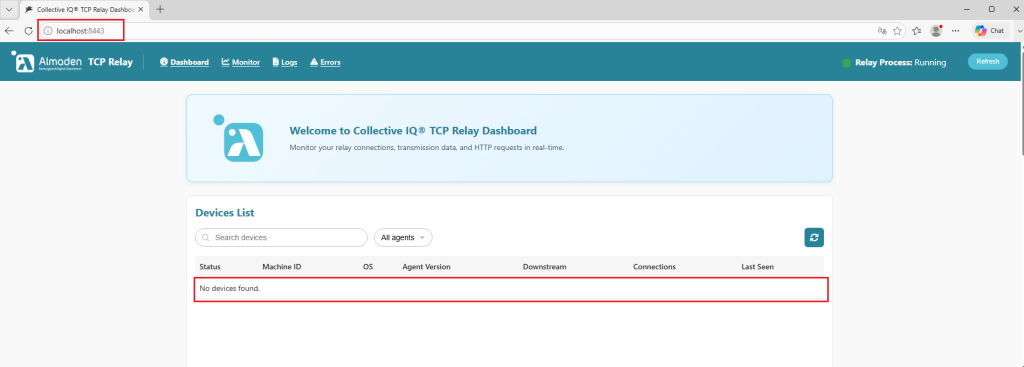
After verifying that both services are running, open a web browser and access the Relay Dashboard using the configured Relay UI Port.
http://<server-name-or-ip>:<Relay_UI_Port>Example:
http://localhost:8443If the dashboard loads successfully, the Relay UI service is running correctly and ready for monitoring.
Verifying the Installation
Confirm that:
- The Relay Dashboard is accessible through a web browser.
- The Relay Process status is Running.
- No startup errors are displayed.
- Connected endpoints appear in the Devices List after agents establish communication with the Relay.
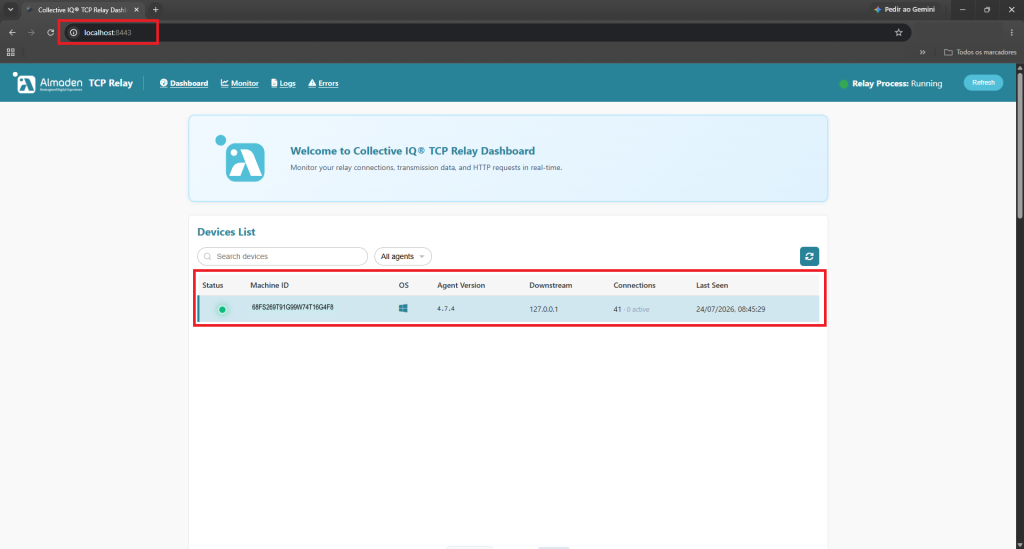
If all these conditions are met, the Relay installation has completed successfully.
