
Microsoft Azure AD (Authentication)
🔐 Azure AD Integration
Secure and Centralized Authentication
The Azure Active Directory (Azure AD) Integration module enables users to access CIQ ITAM using their corporate credentials from Microsoft Entra ID (formerly Azure AD), delivering a unified and secure login experience.
This functionality is essential for organizations seeking centralized authentication and enhanced security. It eliminates the need for multiple logins, improves access control, and ensures that only authorized users can access the system.
Additionally, Azure AD integration supports the implementation of security policies such as Multi-Factor Authentication (MFA) and allows permission management based on groups—enhancing identity management in line with modern information security best practices.
You will need:
- Admin permissions in Azure AD to register and configure the app
- Admin access to the CIQ ITAM portal to apply the integration
- The correct Redirect URI provided by CIQ ITAM
- Access to the Application ID, Tenant ID, and Client Secret
1. Access the Azure Portal
Go to: https://portal.azure.com
2. Register a New Application
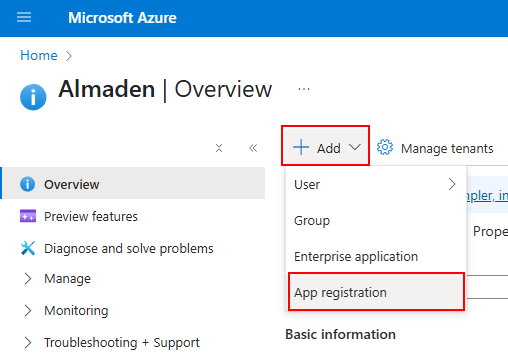
Navigate to Azure Active Directory > App registrations
3. Registration
Click on + New registration
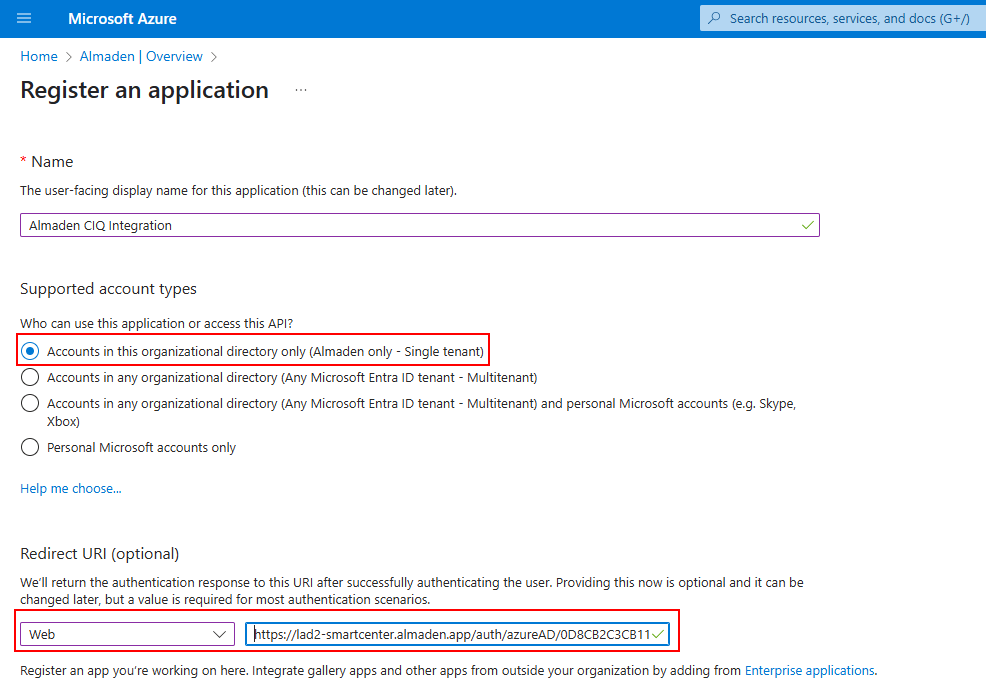
Name the application: Almaden CIQ Integration
Account type: Choose “Accounts in this organizational directory only”
Redirect URI:
Type: Web
URI for LAD1 (Click here)
https://lad1-smartcenter.almaden.app/auth/azureAD/0D8CB2C3CB11EEB8BF0D4E8A4225E869URI for LAD2 (Click here)
https://lad2-smartcenter.almaden.app/auth/azureAD/0D8CB2C3CB11EEB8BF0D4E8A4225E869Click Register

Manage menu > Authentication (Preview)
Click Add Redirect URI
Type: Web
URI for LAD1 (Click here)
https://lad1-smartcenter.almaden.app/azure/codeURI for LAD2 (Click here)
https://lad2-smartcenter.almaden.app/azure/codeClick Register
4. Copy the Required Information

After registering the application:
- Copy the Application (client) ID
- Copy the Directory (tenant) ID
5. Create a Client Secret
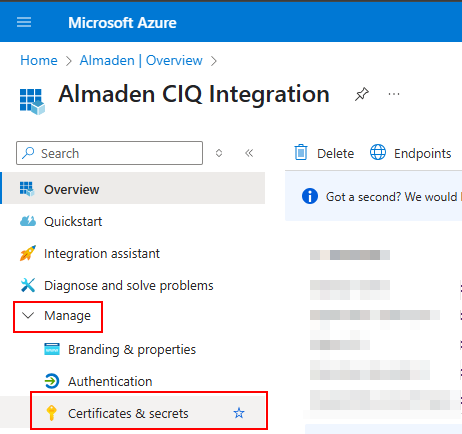
In the left-hand menu of the registered app, go to Certificates & secrets
Click on + New client secret

Name it and set the expiration (e.g., 12 months)
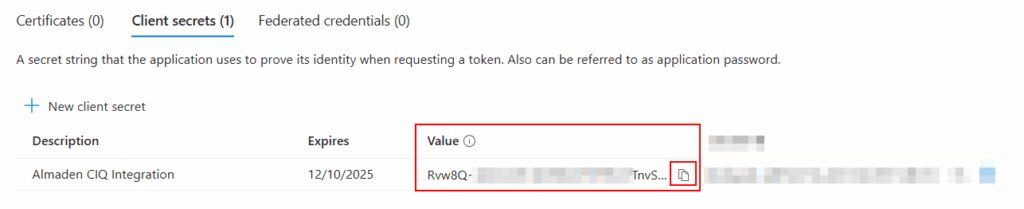
After creation, immediately copy the Value of the secret (not the ID)
6. Fill in the Details in CIQ ITAM
CIQ ITAM> Menu> Integrations> Microsoft Azure AD
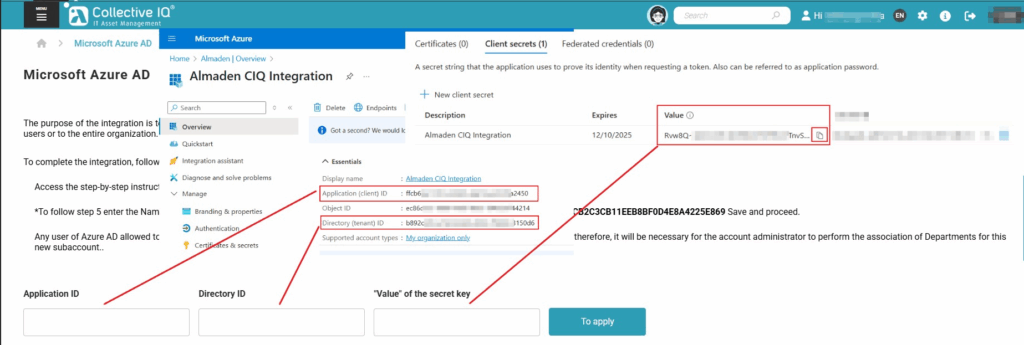
In the CIQ ITAM portal, fill in the fields with the obtained values:
- Application ID → Paste the Application (client) ID
- Directory ID → Paste the Directory (tenant) ID
- “Value” of the secret key → Paste the secret value you created
Click To apply to finalize the configuration.
👥 Important
When accessing for the first time, the Azure AD user will automatically be identified as a new subaccount in CIQ ITAM.
An account administrator needs to associate the correct Departments and permissions after the user’s first login.
