Set Unattended Access – Via Email
Introduction
The Set Unattended Access via Email feature allows you to add a remote computer to your list of accessible devices by sending an invitation link via email. This method is convenient when you need to set up unattended access on a remote machine without direct interaction.
By following the steps outlined below, you can send an email invitation, configure device details, and ensure secure remote access to the computer. This process simplifies remote management and allows for seamless integration into your existing workflow.
Overview
You can add a remote computer to your list using a link sent via email.
The email must be opened on the target computer to complete the setup.
Follow the steps below to configure unattended access via email.
Step 1

Click “Set Unattended Access” from the “+” button dropdown.
Note:
There are multiple ways to add a remote computer.
See Set Unattended Access for all available options.
Step 2
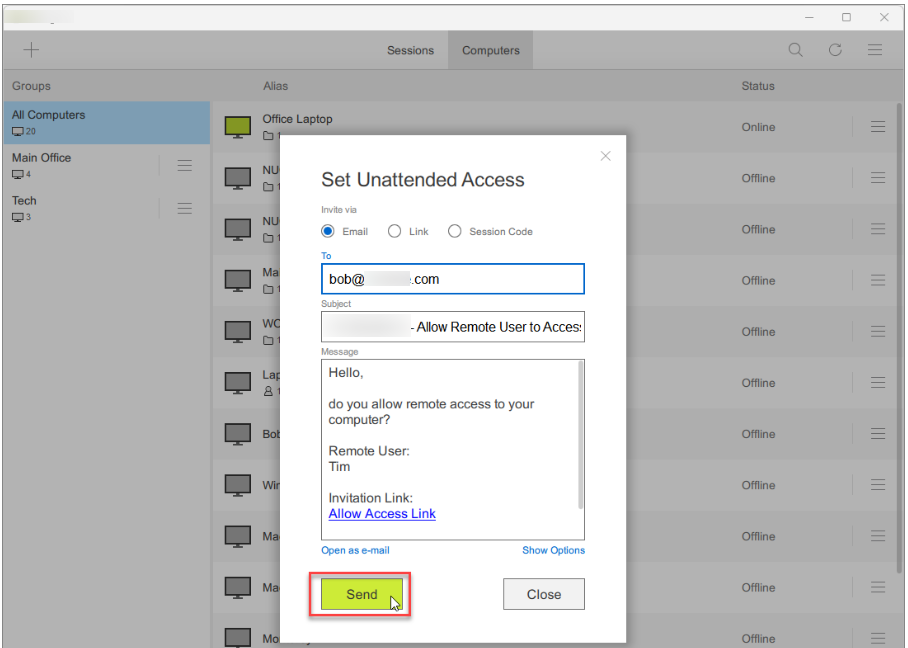
✅ Ensure “Invite via… Email” is selected.
✅ Enter the recipient’s email address.
✅ Click “Send” to send the invitation.
Step 3 (Optional)
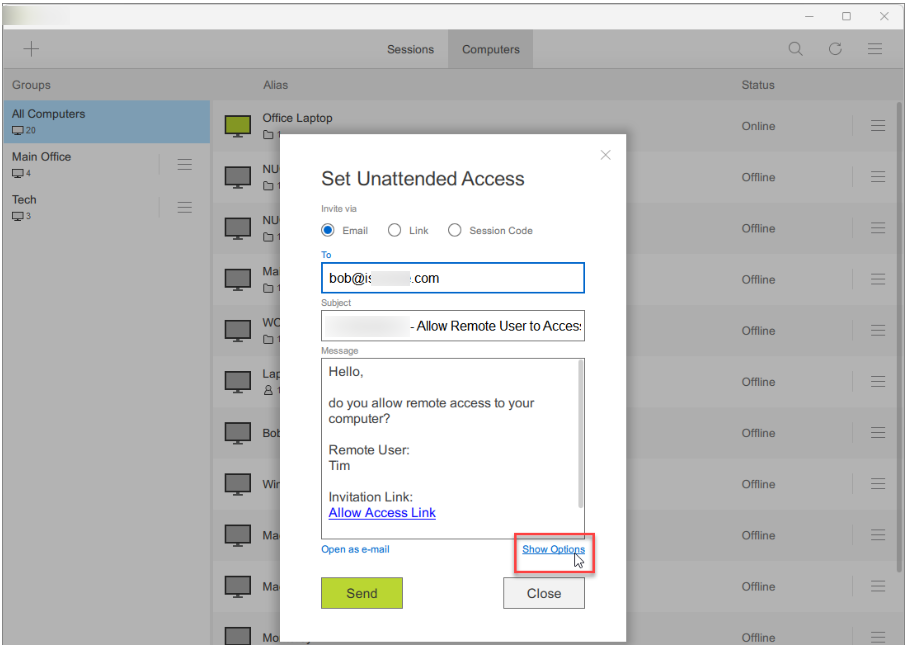
Click “Show Options” to expand the Set Unattended Access overlay for additional settings.
Step 4 (Optional)
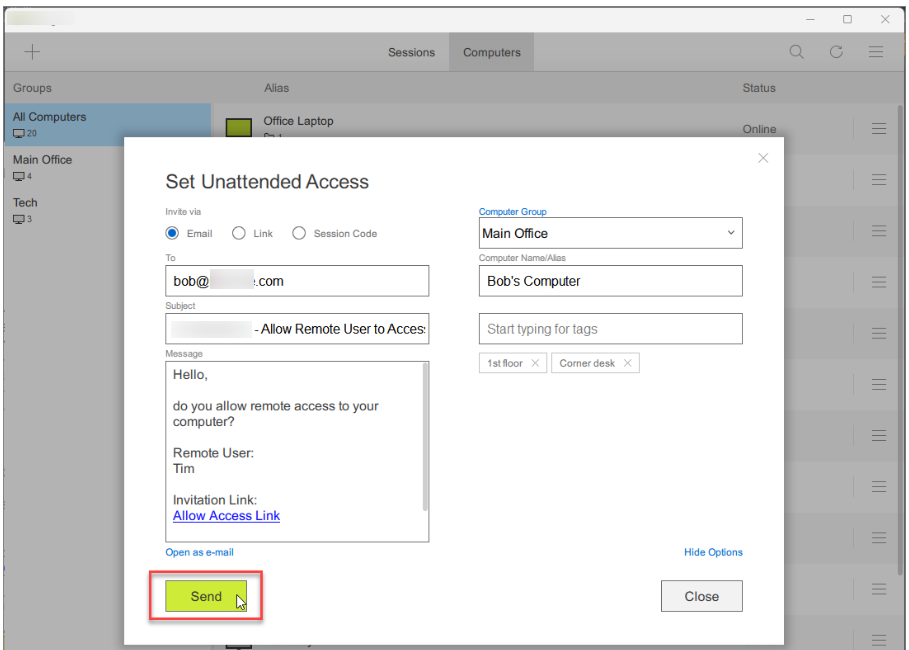
Here, you can:
1️⃣ Select a group for the remote computer.
2️⃣ Assign an alias (computer name).
3️⃣ Add tags for easy identification.
Note:
If no group is selected, the computer is added to All Computers by default.
You can later drag and drop the computer into another group.
Any user in the selected group will have access to the remote computer.
Step 5 (Remote Computer)
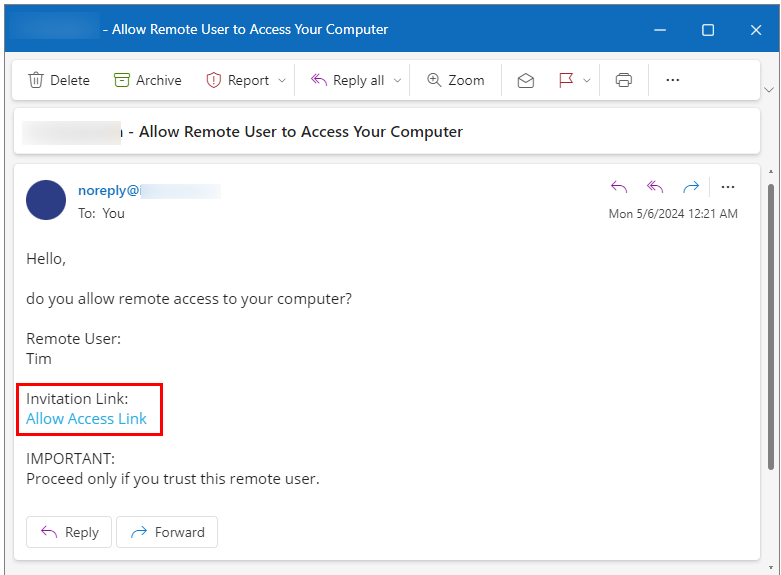
💻 Open the email on the remote computer.
📩 Find the email with the subject “ISL AlwaysOn – Allow Remote User to Access Your Computer”.
🔗 Click the “Allow Access Link” to begin setup.
Step 6 (Remote Computer)
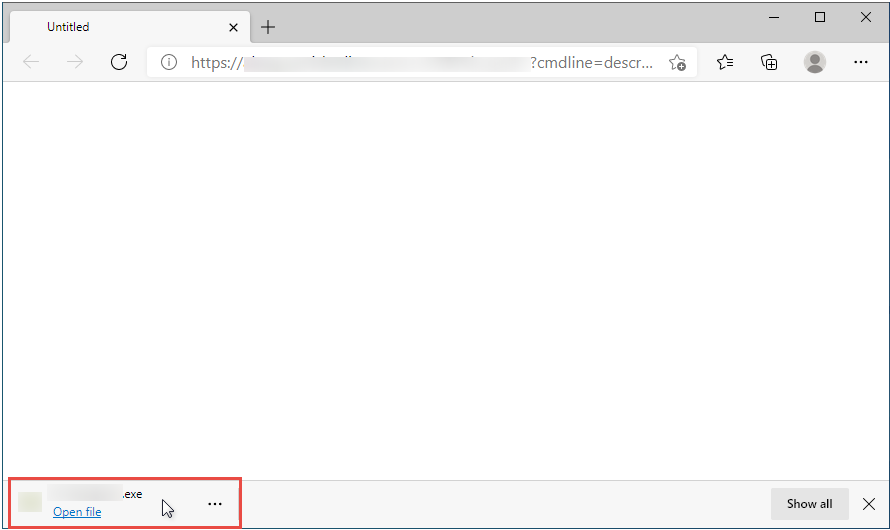
✅ Click “Run” to execute ISL AlwaysOn, which downloads automatically.
Notes:
The browser detects the operating system and downloads the correct file.
If Automatos Remote Control Server is already installed, skip to Step 9.
Click “Next” to proceed with the installation.
Click “Finish” to complete the installation.
Step 9 (Remote Computer)
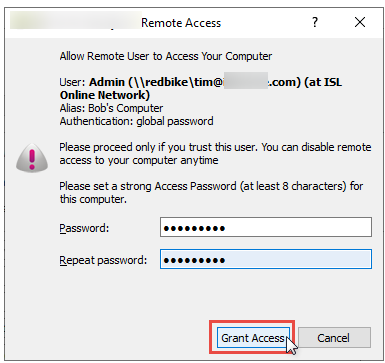
🔍 Review the details and click “Grant Access”.
Note:
If this is the first-time installation, you must set an Access Password.
This password will be required to connect remotely to the unattended computer.
Step 10

The computer is now added to the selected group and available for remote connection.

