
Basic Features – Administrative Mode
Introduction
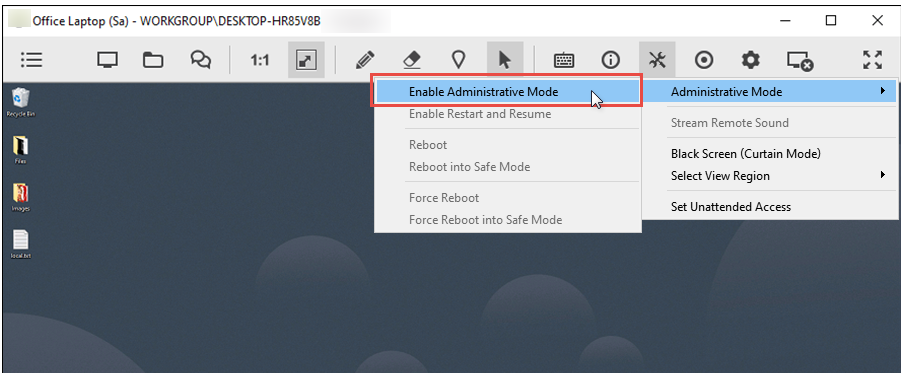
When you are in a remote support session with a client, click on the “Tools” icon and select “Administrative Mode” from the options, then click “Enable Administrative Mode”.
Note: Administrative mode is enabled by default for isolated access.
Enable Administrative Mode
When you are in a remote support session with a client, click on the “Tools” icon and select “Administrative Mode” from the options, then click “Enable Administrative Mode”.
There are two possible scenarios:
A) The remote user does NOT have administrative rights
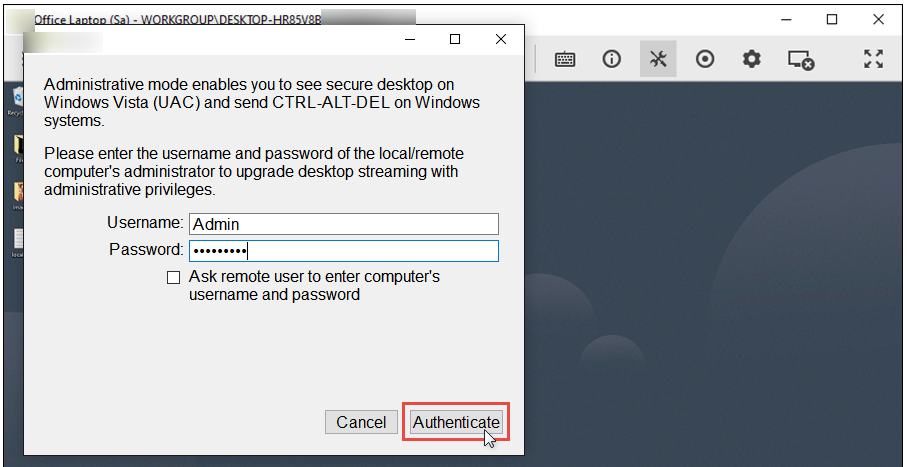
When the user account on the client’s computer does not have administrative rights, entering administrative mode will open a window where you (the operator) can enter your username and password, or select a checkbox to request the client to enter their credentials on their side, granting you administrative rights.
Enable Administrative Mode
After providing the correct administrator credentials, a UAC prompt will appear on the remote computer. This prompt needs to be confirmed by the remote user by clicking “Yes”. Once confirmed, the operator will be able to view all future UAC prompts during the session. Note that UAC dialogs last for 2 minutes. If the remote user does not confirm the UAC within two minutes, the request will be denied and administrative mode will not be enabled.
B) The remote user account HAS administrative rights
If the current user account on the remote computer has administrative rights, the client should receive a prompt requesting privilege access.
