
Microsoft Teams Data Collection
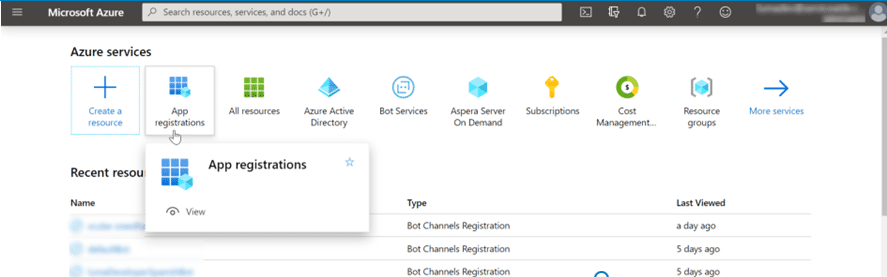
Log in to the Azure Portal using your administrator credentials. Once logged in, create an application in Azure AD. This step will allow you to configure the necessary information to integrate the MS Teams data collector.
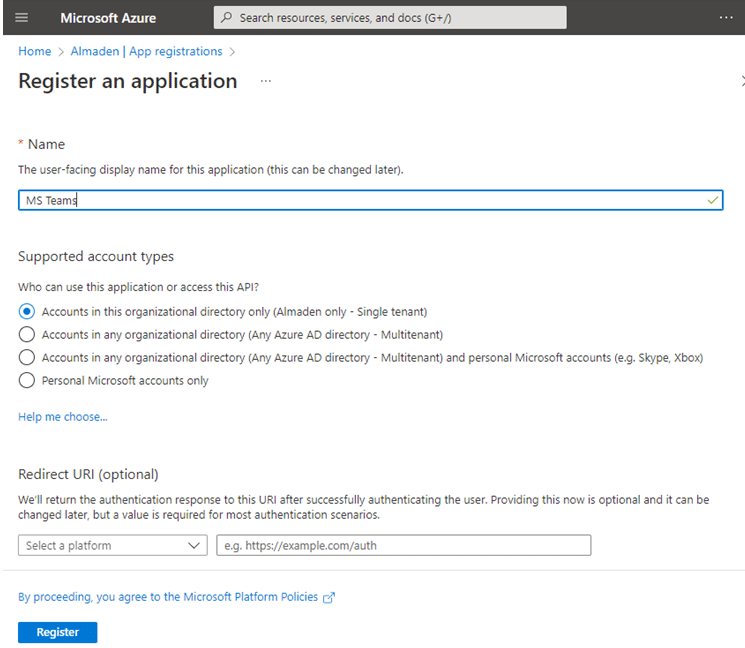
In the application registration, select:
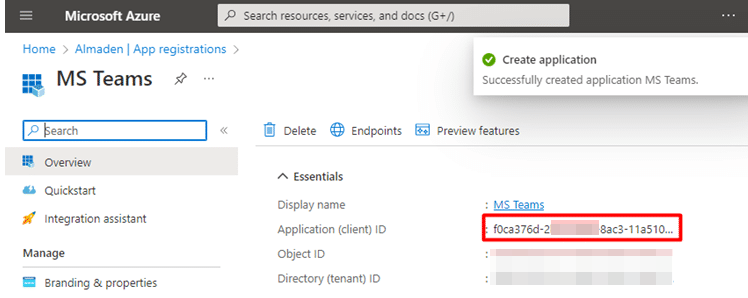
After creating the application registration, you will receive an “Application (client) ID.” Copy this generated code as it will be used later for authentication and authorization in the CIQ portal.
After creating the application, create the “Client Secret” and copy the value to fill in the CIQ portal.
This integration consumes the Microsoft Graph API, so we need to grant the following permissions:
Application permission
- CallRecords.Readl.All
- User.Read.All
- Directory.Read.All
This permission will ensure that the application has proper access to the required resources and functionalities.
With these permissions, your service integration will be configured. Now, you will be able to enjoy the benefits of MS Teams integration with Alma.
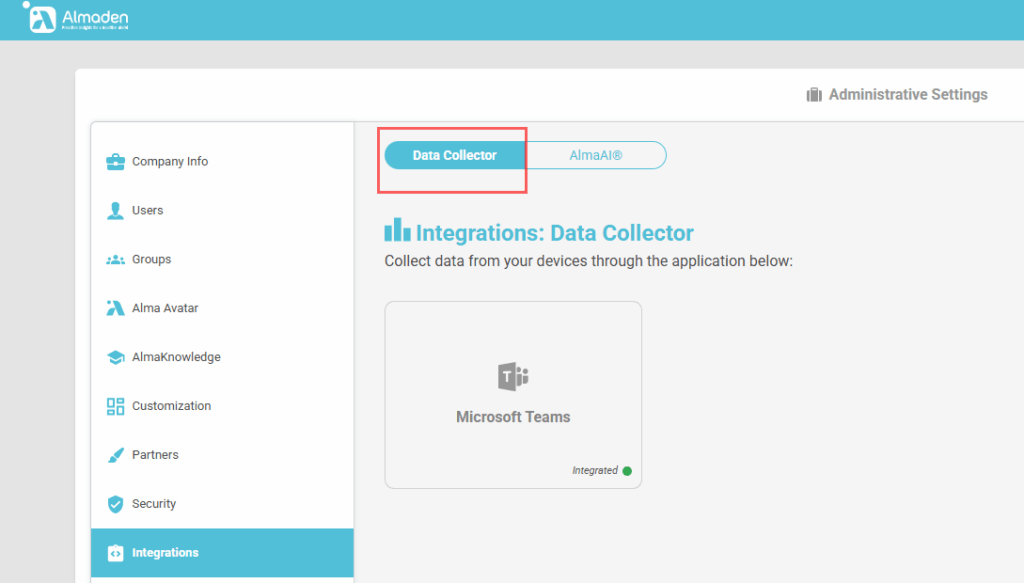
Step-by-step MS Teams Data Collector integration.
To enable CIQ to collect information from Microsoft Teams calls, follow the simplified steps below.
1. Access the Azure Portal
- Log in with administrator credentials at:
https://portal.azure.com/
2. Register the Application
- In the Azure home panel, select App Registrations.
- Click + New Registration.
- On the registration screen:
- Enter as the Name.
- Mark: Accounts in this organizationa directory only (Almaden Only – Single tenant)
- Click Register.
- Copy the “Application (Client) ID” to use in step 5
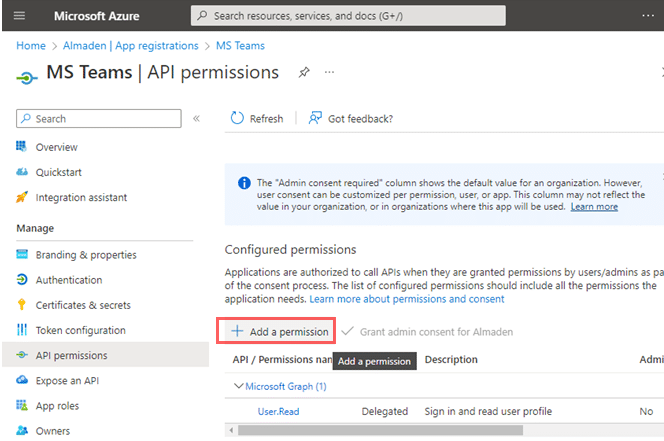
3. Configure API Permissions
- In the left-hand menu, click API permissions.
- Click + Add a permission.
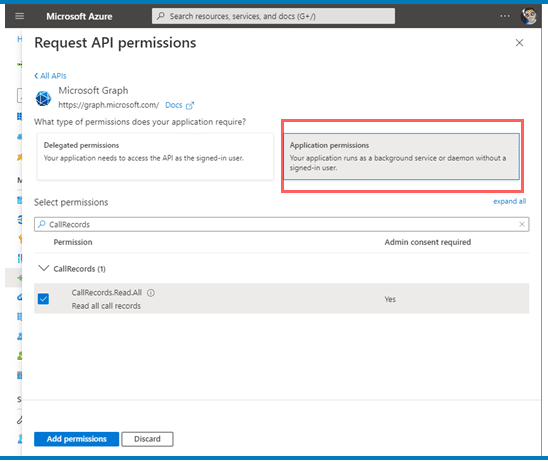
- On the Request API permissions screen, select Microsoft Graph.
- Under Application permissions, select:
- CallRecords.Read.All
- User.Read.All
- Directory.Read.All
- After selecting all, click Grant admin consent.
- Confirm by clicking Yes.
- A confirmation message will appear:
“Administrator consent successfully granted for the requested permissions.”
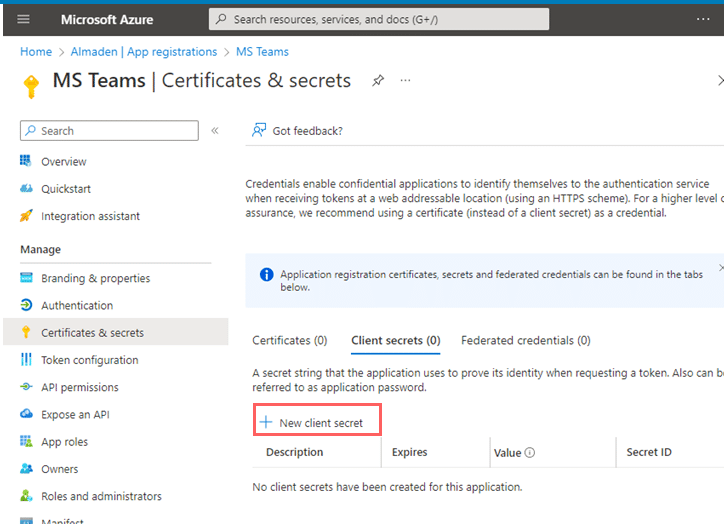
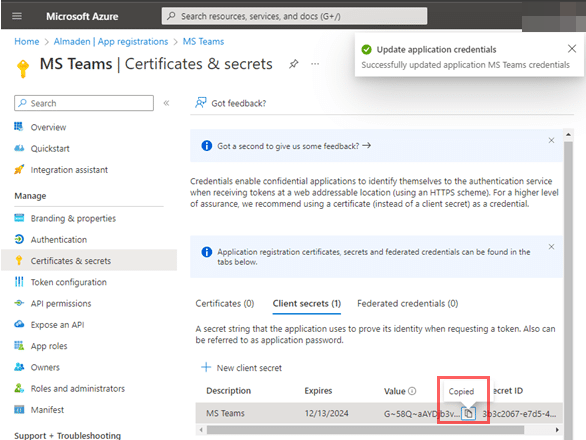
4. Generate Client Secret
- In the left menu, go to Certificates & secrets.
- Click + New client secret.
- In Description, type MS Teams.
- In Expires, select a validity period (e.g., 24 months).
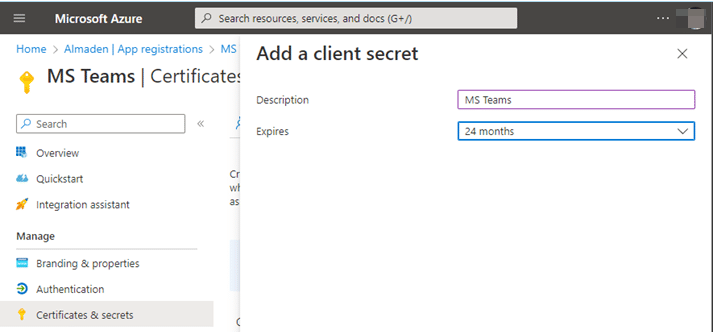
- Click Add.
- Copy the value in the Value field (this is your client secret) to use in step 5
5. Finalize in CIQ Platform
At the end of the configuration, gather the following information from your Azure application:
- Application (client) ID
- Client Secret (Secret Key)
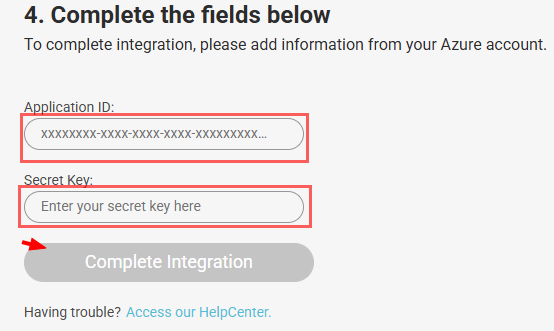
Paste these values into the corresponding fields in the CIQ Platform to complete the integration.
