
Basic Features – Select View Region
Introduction
During a remote session, viewing the entire screen of the remote computer is often the default and most convenient option. However, when working with limited bandwidth or focusing on a specific application or area, it can be more efficient to view only a selected portion of the screen.
The “Select View Region” feature allows you to define a custom area of the remote desktop to display, helping reduce bandwidth usage and improving performance in slower connections. This is especially useful for tasks that require attention to only one part of the screen.
Follow the steps below to set a custom view region during your remote session.
Select View Region
Note: By default you will be viewing the full desktop of the remote computer when session starts, however you can select a custom region and only view that part of the remote screen. This option becomes useful when trying to reduce the bandwidth usage on slow connections.
Step 1
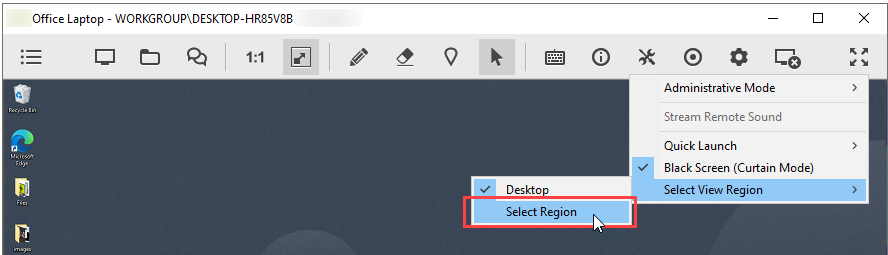
Click on “Select View Region” and then select the “Custom Region” option.
Step 2
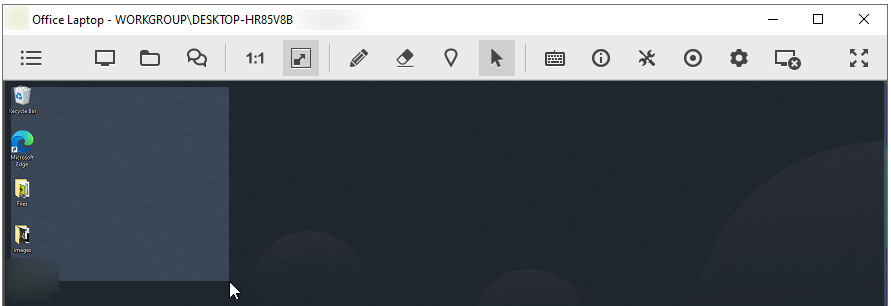
Click and drag to select a custom region of the screen.
Step 3
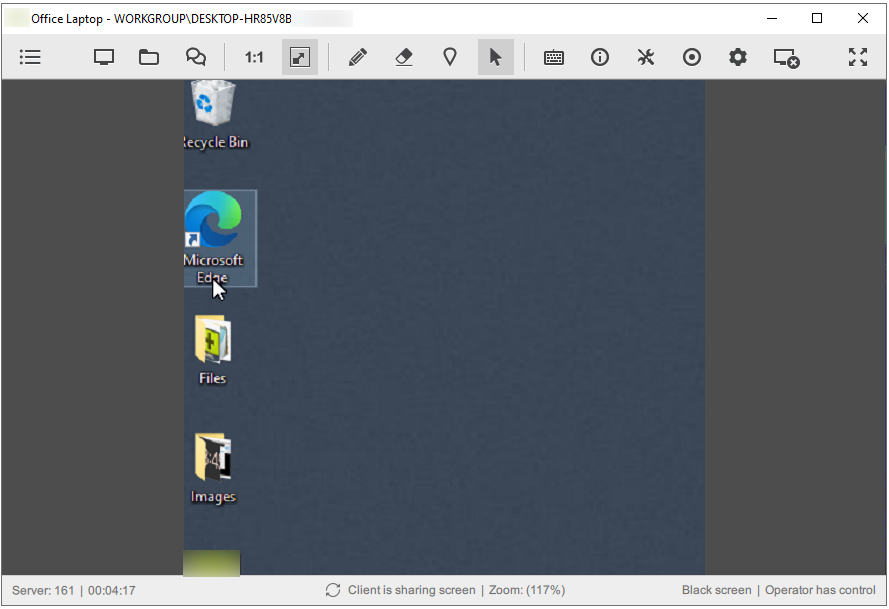
You will only view the selected region from now on.
Note: Repeat the steps above to select another region or reset the view by clicking on “Select View Region” and then selecting the “Desktop” option.
