
Administration – Audit
Introduction
The Audit Log feature provides comprehensive tracking of actions performed by Domain Administrators, ensuring transparency and accountability across administrative operations. This powerful tool enables system administrators and auditors to review detailed logs of changes, including who made them, when they occurred, and what data was affected. With customizable columns, advanced filtering options, and detailed data insights, the Audit Log facilitates easy monitoring and investigation of activities within the domain, supporting both operational oversight and compliance requirements.
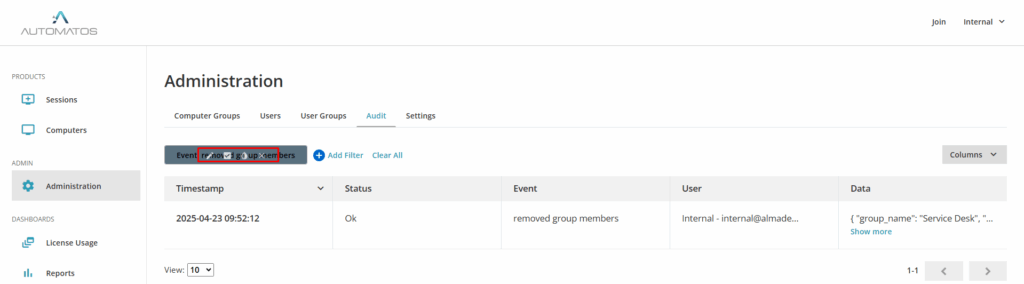
Actions performed by Domain Adminstrator(s) are recorded in the Audit Log enabling the review of all actions and changes to be performed.
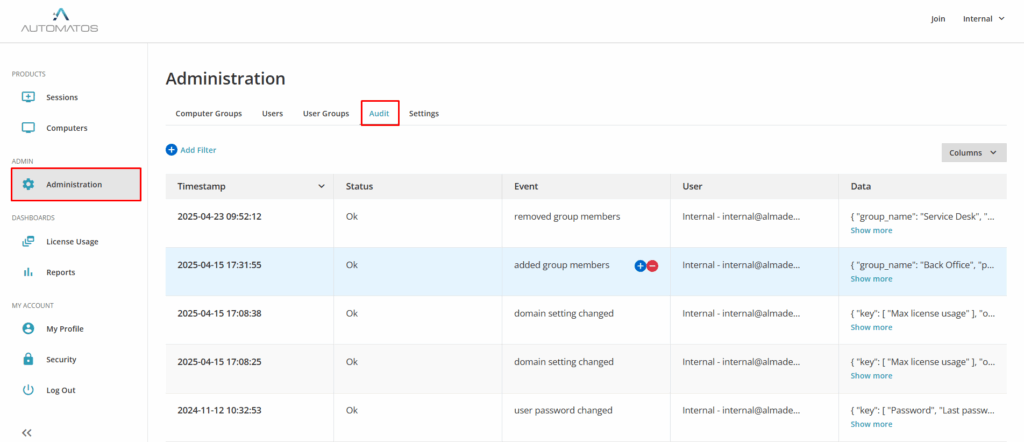
By default 5 columns are shown for each action performed by a Domain Administrator: Timestamp (Date and time of action being performed), Status, Event (Short description of performed action), User (Username) and Data (Before and After state of the action – Click on “Columns” to expand the section).
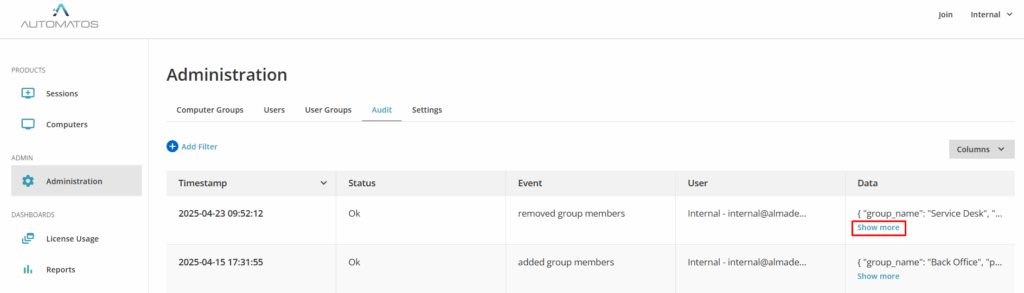
Click “Show More” for a particular action in the Data column to expand the audit log. Data section contains the name and id of the object (setting) being changed as well as the Before and After state, so the action can be reverted.
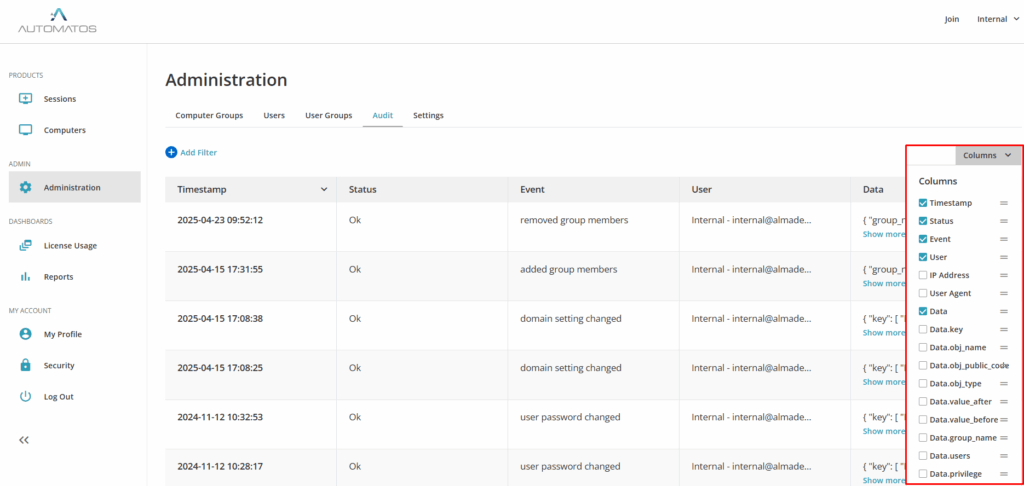
Click on “Columns” button to display additional columns with more information contained in the audit log. Available columns are:
- Timestamp
- Status (possible errors encountered during the execution of audited action will be reported here)
- Event
- User
- IP Address
- User-Agent
- Data
- Data.<field_name> – Dynamically allocated columns based on fields contained in the Data portion of log lines
Note: Data fields are shown when “Show More” is clicked in the Data column.
In the audit log view it is possible to filter the logs returned, if you are interested in a specific event, time frame, user etc.
Filter can be constructed in two different ways and they can be edited afterwards:
- Include and Exclude values
- Add new filter
Include and Exclude desired values
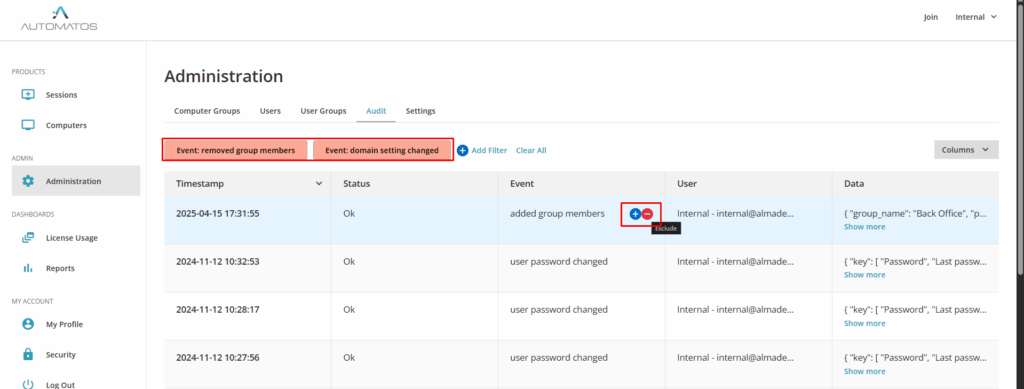
When you hover your mouse cursor over a value in a log line, two buttons are shown next to the value, clicking the + button will create an include filter for the selected value, meaning only the log lines where the field matches the value you included will be shown. Similarly if you click the x button you will create and exclude filter, meaning only the log lines where field does not match the selected value will be returned.
Note: Include and Exclude filters work differently when selecting them for the “Timestamp” field. In case of a Timestamps + button means After, meaning only the log lines that were created after the selected time stamp will be returned. Similarly – button means Before.
Multiple include and exclude filters can be stacked. Only the log lines that satisfy all conditions will be returned.
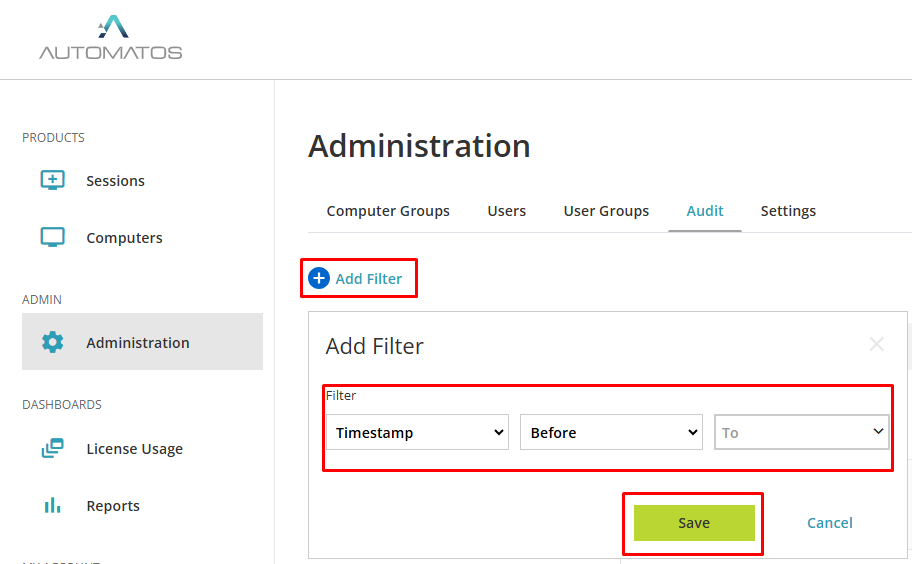
Add New Filter
Step 1
- starts with / not starts with, which create include/exclude filter for the prefix value
- e.g. “Event starts with user” filter will match: “user created”, “user setting changed”… log lines
- e.g. “Event not starts with user” will match loglines where event doesn’t start with “user”: “domain setting changed”…
- before / after / between, which are only applicable with Timestamp field and allow you to define the time range of log lines returned
When you create a filter click “Save” to apply it.
Edit Existing Filter
 Edit – Add/remove prefix strings or edit the existing one.
 Toggle – Toggle the filter on or off. If you toggle the filter Off, the filter remains saved, but it does not take effect until you toggle it back On.
 Invert – Invert the filter, Include filter will become Exclude filter and vice versa. In case of Timestamp related filter, the After filter will become Before and vice versa.
 Remove – Delete the filter.
