Set Unattended Access – Via Code
Introduction
The Set Unattended Access via Code method allows you to securely add a remote computer to your list of devices using a unique access code. This is a convenient solution when you want to establish a permanent connection without sending emails or links.
By generating and sharing a session code, the remote user can join the session, install the required software, and grant access with just a few clicks. Follow the steps below to configure unattended access using this method efficiently.
Step 1

Click “Set Unattended Access” from the “+” button dropdown.
Note: A computer can be added to the list of remote computers in several different ways, depending on your use case. All available options are described here: Set Unattended Access
Step 2

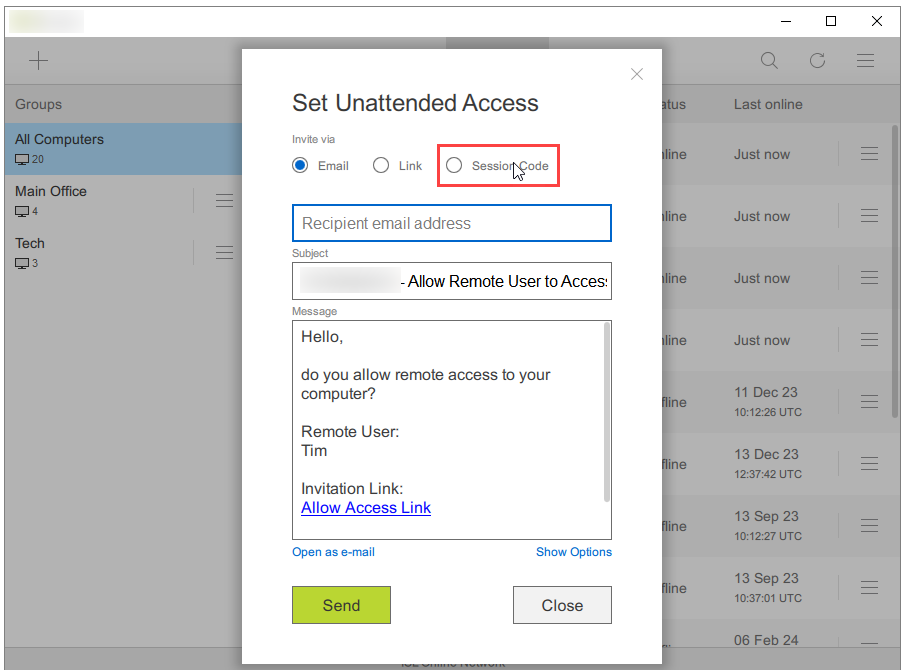
Click the “Session Code” radio button.
Step 3

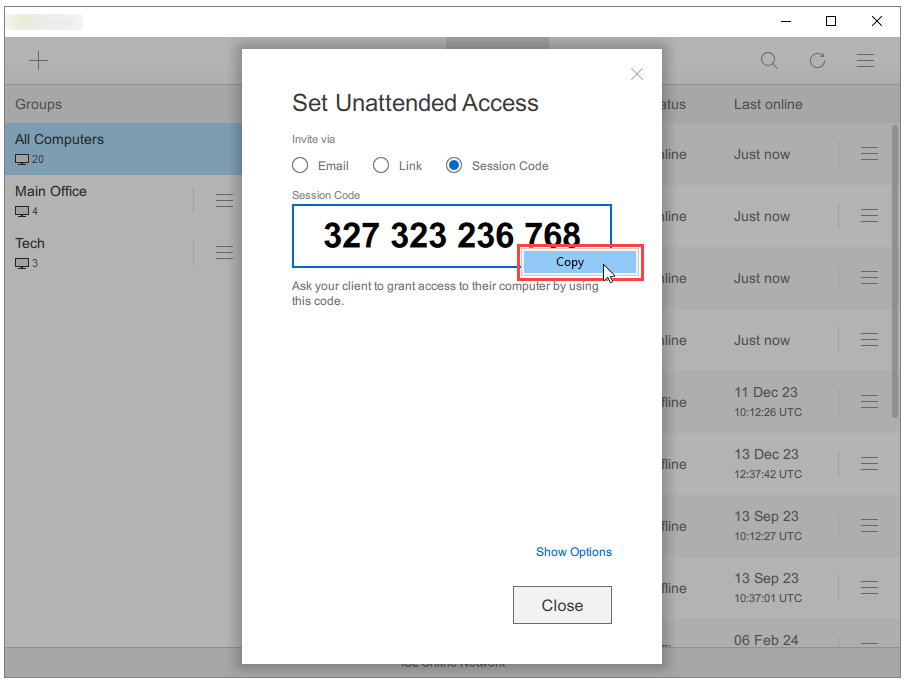
Copy the access code — permanent granted access code.
Step 4 (Remote Computer)

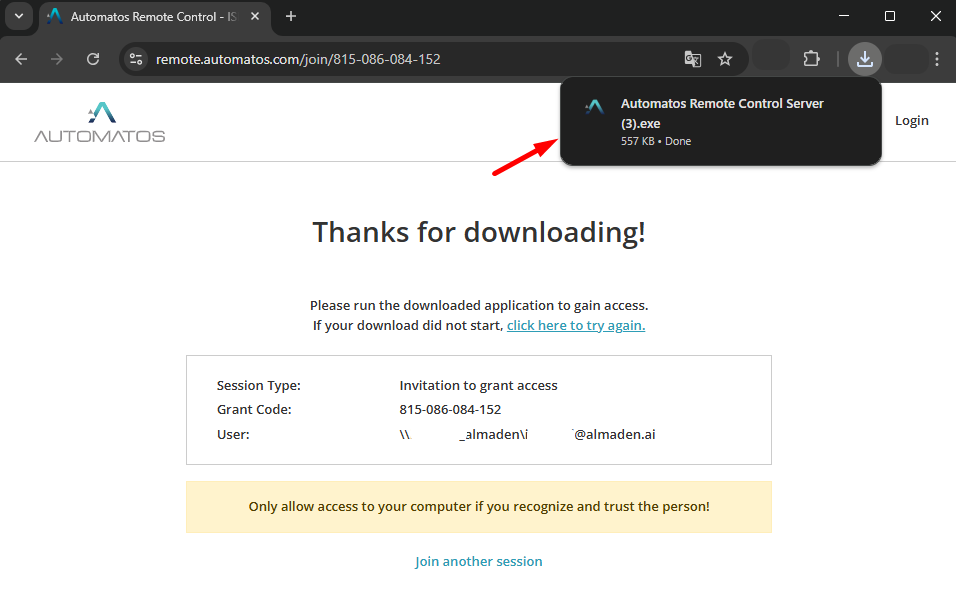
On the remote machine, type the code at https://remote.automatos.com/users/main/join.html and click the “Join” button.
Step 5 (Remote Computer)

Click the “Run” button to run Automatos Remote Control Server, which was downloaded automatically.
Note: The browser detects the computer’s operating system and downloads the corresponding executable.
Step 8 (Remote Computer)

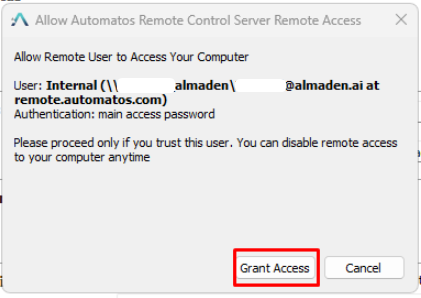
Review the information and click the “Grant Access” button.
Note: If this is the first time is being installed on this computer, you will be asked to set the Access Password. The access password must be entered whenever you want to establish a connection to the unattended computer.
Step 9

The computer is available for connection.
Note: Consider renaming the new computer so it is easier to find next time, e.g., Jim’s Computer.

