Basic Features – File Transfer
File Transfer
The topic will cover the different ways to manage files, including the File Manager, Event Log, sending and receiving files, and displaying transfers.
There are different ways to manage files: File Manager, Eventlog, Send Files Dialog, Receive Files Dialog, Display Transfers.
File Manager
Step 1
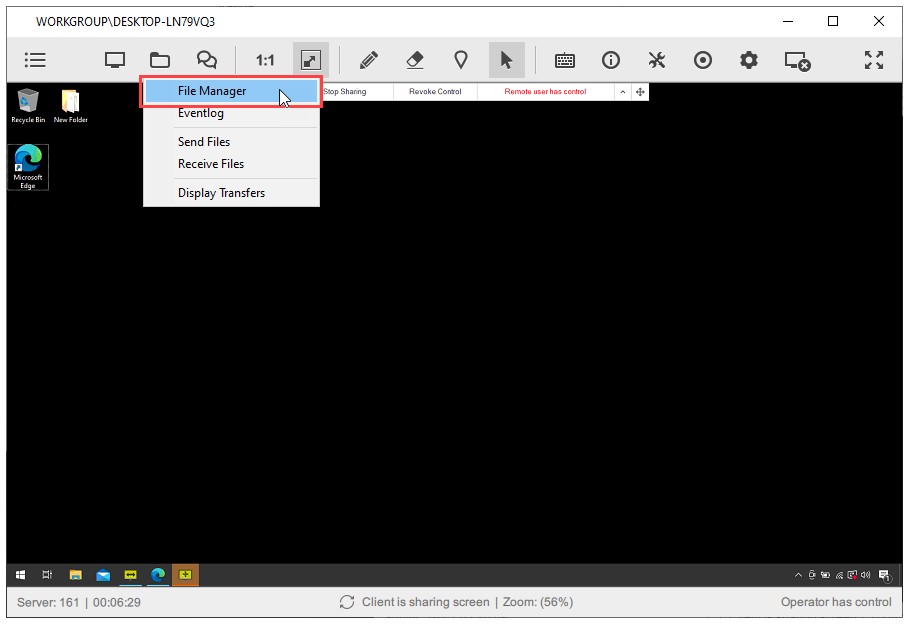
Connect to the remote computer and click “File Manager” from the File Sharing drop-down menu.
Step 2 (Client-Side Only)
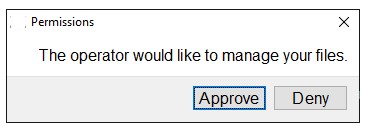
When the File Manager starts, the client will be prompted to allow the operator to manage their files.
Note: The prompt varies depending on the audit log level:
- No Audit – No audit log is created. The standard prompt is displayed.
- Basic Audit Level – Logs filename, size, and application version (local & remote). An extended prompt is displayed.
- Detailed Audit Level – Includes all Basic Audit Level details plus file paths (local & remote) and file hash. An extended prompt is displayed.
Note: If connected to an unattended computer, permission is automatically granted.
Step 3
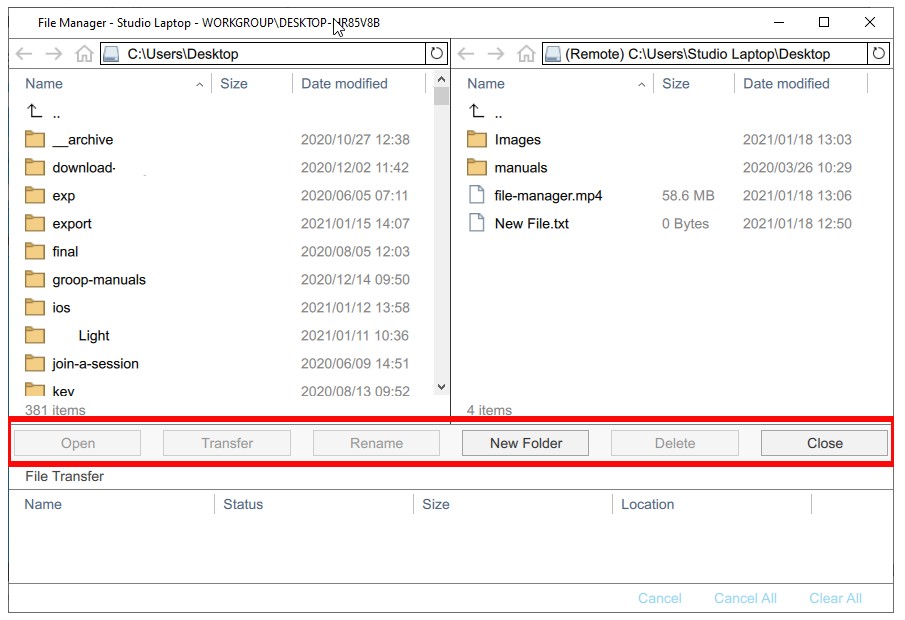
The File Manager allows you to perform various file operations:
Navigation Shortcuts
- Back –
Alt + Left Arrow - Forward –
Alt + Right ArroworShift + Backspace - Home –
Alt + Home - Up One Folder –
Alt + Up Arrow - Focus Path Location –
Ctrl + L - Deselect –
Escape
Command Shortcuts
- Open –
Enter - Transfer –
Ctrl + Enter - Rename –
F2 - Create New Folder –
Ctrl + Shift + N - Delete –
Del - Close File Manager –
Alt + F4
Step 4
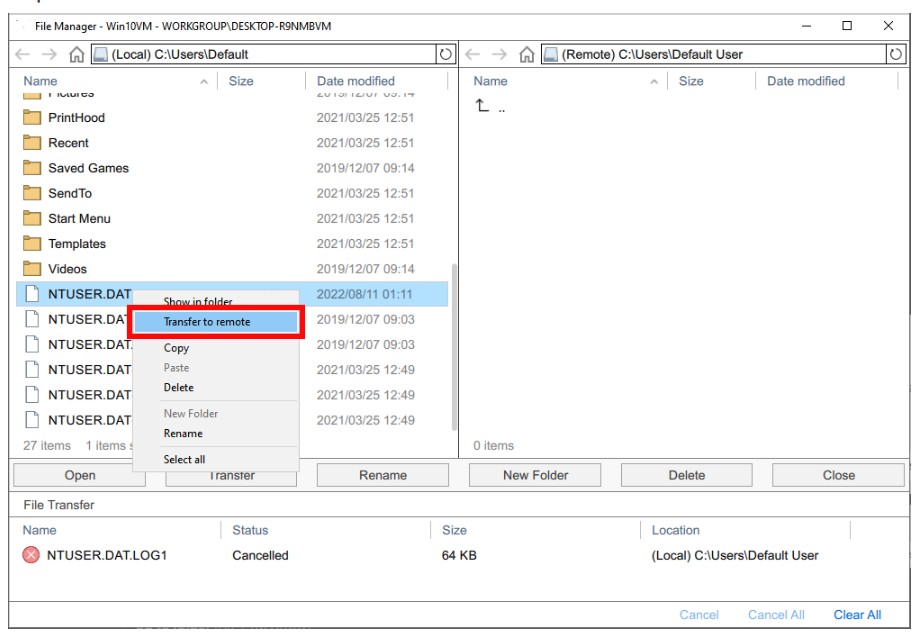
Right-click on a file to access the context menu.
Note: The Transfer option dynamically adjusts to indicate whether the file will be sent to the remote or local computer.
Event Log
Step 1
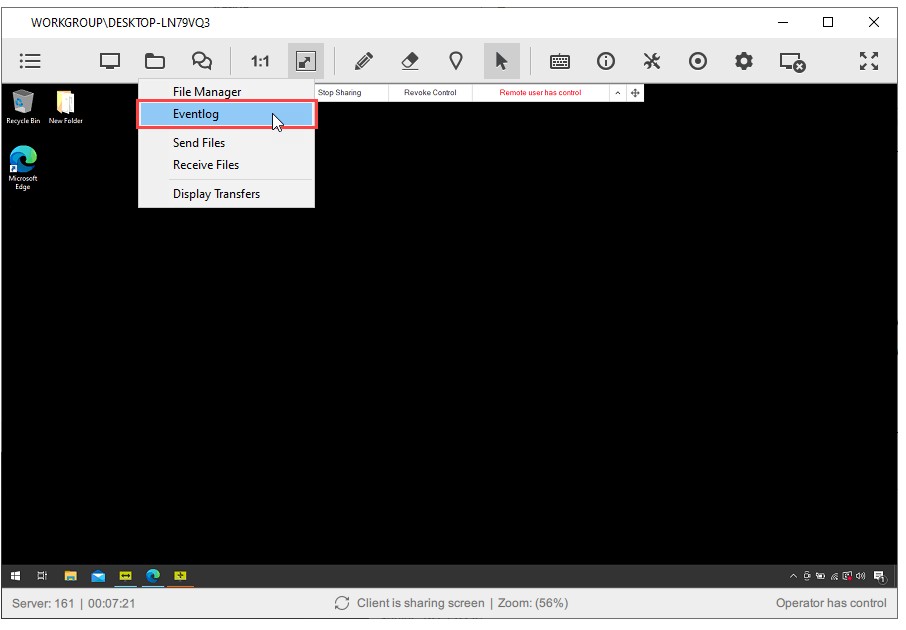
Click “Event Log” from the File Sharing drop-down menu.
Step 2
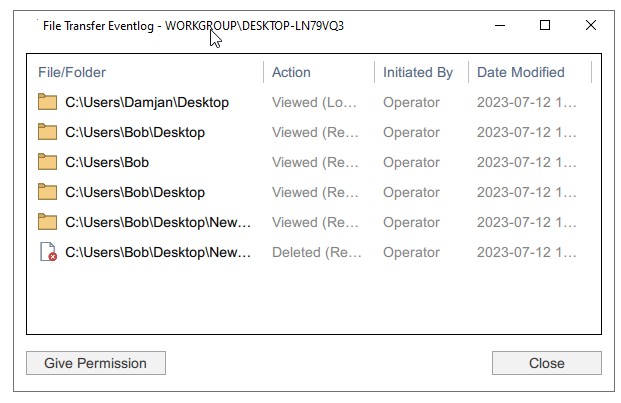
The Event Log window opens.
Sending Files
Step 1
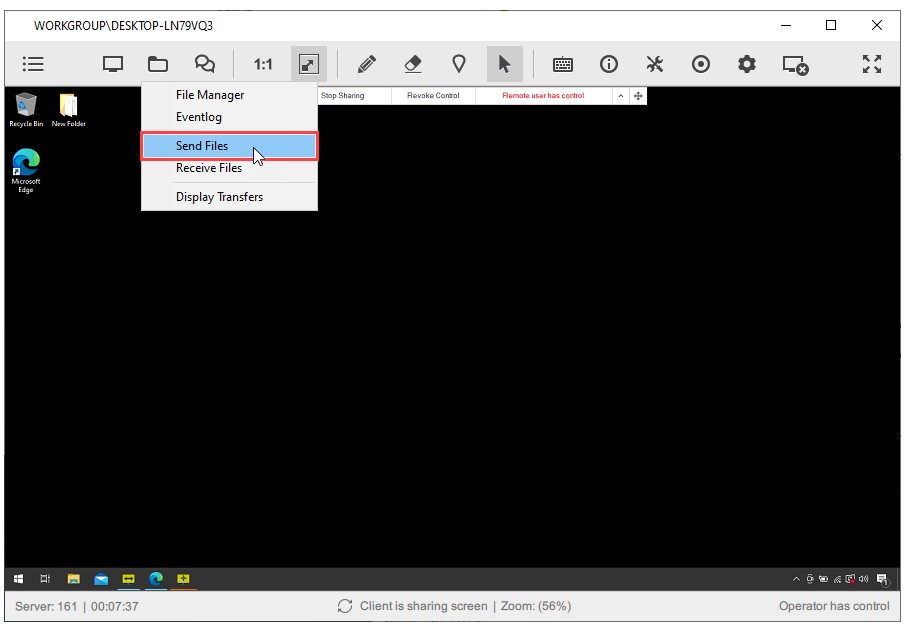
Click “Send Files” from the File Sharing drop-down menu.
Step 2
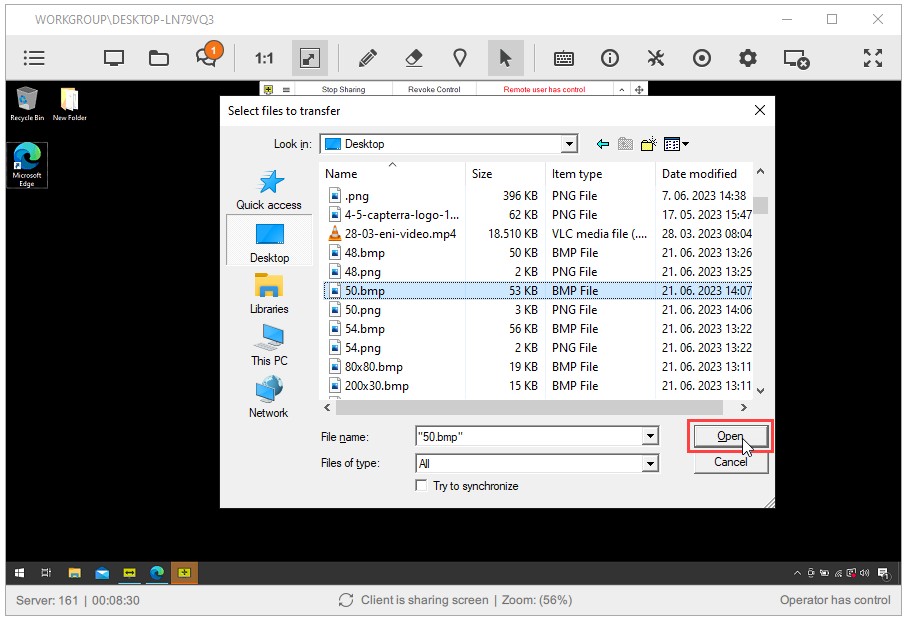
Select the file you want to send and click “Open”.
Note: If the “Try to synchronize” option is unchecked, the recipient must choose whether to Replace, Save (with a new suffix), or Cancel the transfer.
Note: If “Try to synchronize” is enabled, the remote file is backed up (by renaming the original), and the new file is transferred. If no changes are detected via file hash, no transfer occurs.
Receiving Files
Step 1
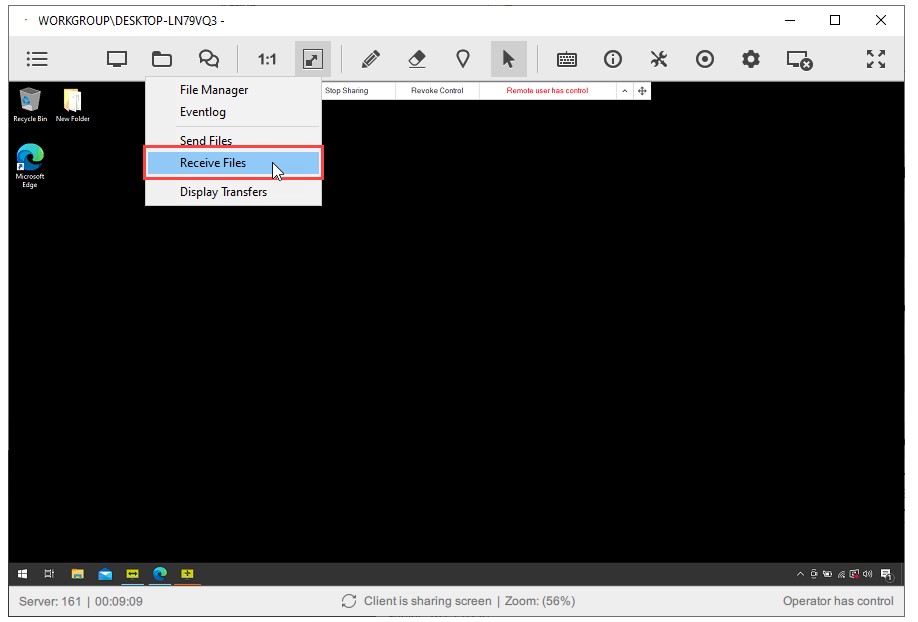
Click “Receive Files” from the File Sharing drop-down menu.
Step 2
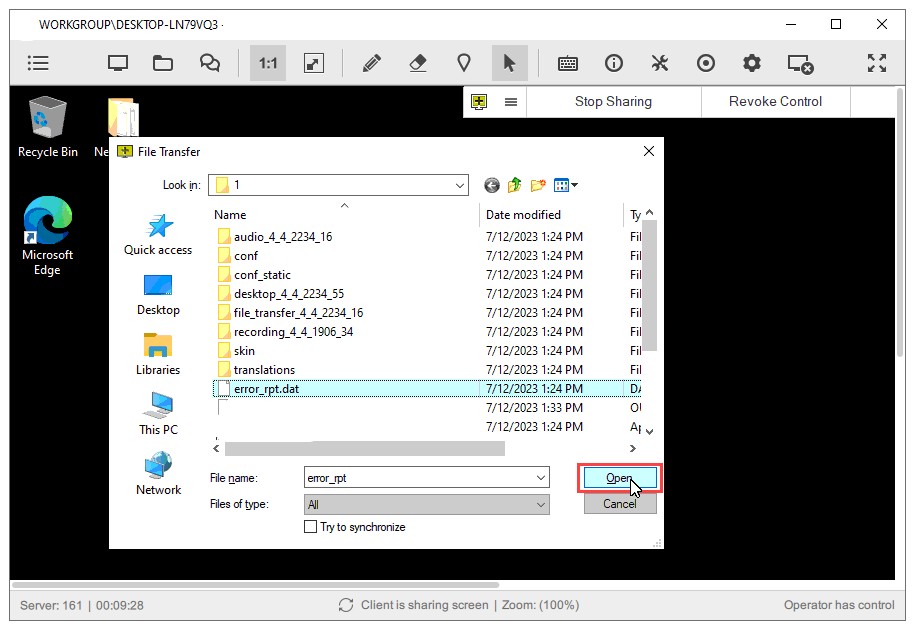
Select the file you want to receive and click “Open”.
Note: If the “Try to synchronize” option is unchecked, the recipient must decide whether to Replace, Save (with a new suffix), or Cancel the transfer.
Note: If “Try to synchronize” is enabled, the remote file is backed up (by renaming the original), and the new file is transferred. If no changes are detected via file hash, no transfer occurs.
Displaying Transfers
Step 1
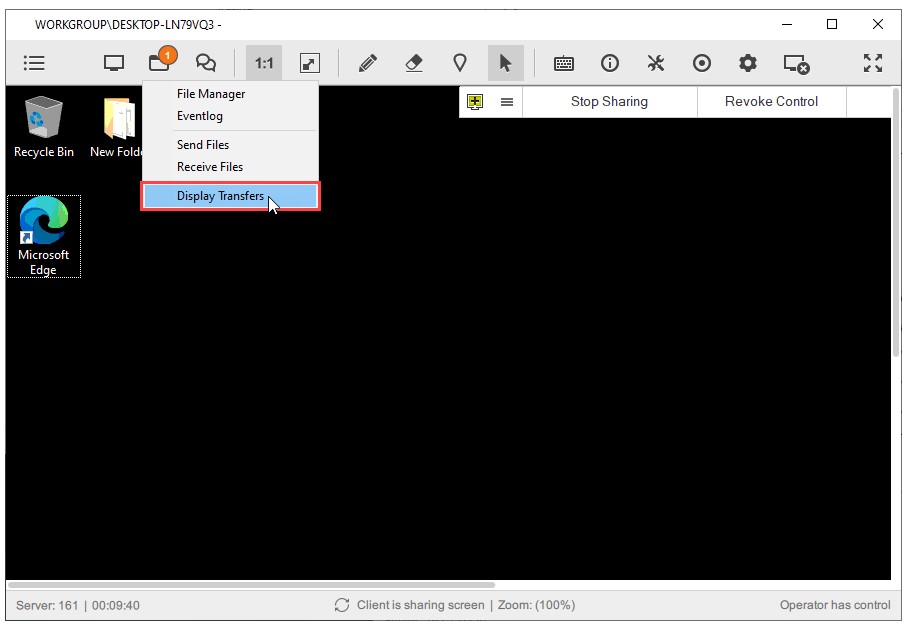
Click “Display Transfers” from the File Sharing drop-down menu.
Step 2
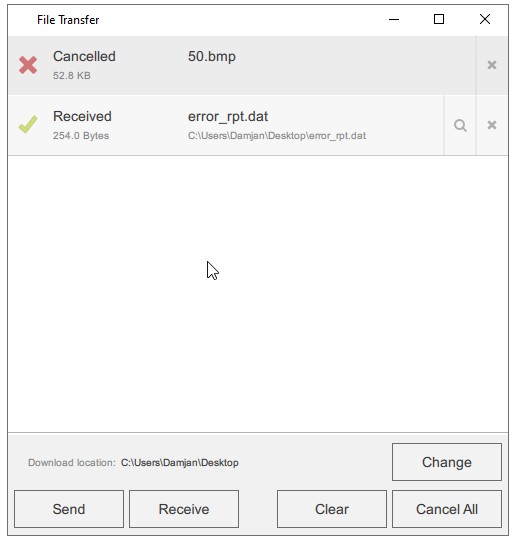
The File Transfer window provides the following options:
- Change Download Location – Set the default folder where received files will be saved.
- Send Files – Click the Send button to browse and select files for transfer. Alternatively, drag and drop files into the File Transfer window.
- Receive Files – Click Receive to prompt the remote user to send files. If granted control, you can also select files directly from the remote computer.
- Clear Transfer History – Remove the list of sent/received files from the window. The files themselves remain in the Download location folder and must be manually deleted if needed.
- Cancel All Transfers – Stop all active file transfers (both incoming and outgoing). The transfer status will change to Canceled, and the user must resend the files if necessary.
This version is more structured, easier to follow, and improves clarity while keeping the original meaning. Let me know if you’d like any adjustments! 🚀

